토비의 스프링 : 스프링 바이블 * 필요한 부분 설계 패턴 - 미국식 합리주의(분업화)
Ch.2 스프링 DI를 이용한 객체 생성
DI는 Dependency Injection의 약자로서, 우리말로는 '의존 주입'이라는 단어로 번역되어 사용된다.
'의존'이라는 단어에서 알 수 있듯이 DI는 의존을 처리하는 방법에 대한 내용이다. 스프링은 기본적으로 DI를 기반으로 동작하기 때문에, 스프링을 잘 사용하려면 DI에 대한 이해가 필수적이다.
의존(Dependency)
DI는 의존(Dependency)에 대한 설계 패턴이다. 기능을 실행하기 위해 다른 클래스(또는 타입)를 필요로 할 때 이를 의존(dependancy)한다고 말한다.
의존 객체를 직접 생성하는 방식의 단점
개발 생산성이 적체적으로 낮아지는 상황이 발생한다.
DI를 사용하는 방식의 코드 : 의존 객체를 외부에서 조립함
의존 객체를 직접 생성하는 방식과 달리 DI는 의존 객체를 외부로부터 전달받는 구현 방식이다.
스스로 의존하는 객체를 생성하지 않고 위부의 누군가가 의존하는 객체를 넣어준다는 의미로 이런 방식을 Dependency Injection(의존 주입), 즉 DI라고 부른다. 다른 말로는 객체를 연결(wire)한다는 표현을 쓰기도 한다.
여기서 누가 객체를 생성하고 객체들을 서로 연결해줄까? 그런 역할을 수행하는 것이 조립기이다.
스프링이 바로 이 조립기에 해당한다. 객체를 사용하도록 변경해주어야 하는 곳이 많더라도 변경되는 부분은 조립기로 제한된다. 변경되는 코드는 조립기의 역할을 하는 클래스뿐이다.
SpringEx01.spring3.Hello - 인터페이스로 생성
package spring3;

public interface Hello {
public abstract void sayHello(String name);
}
SpringEx01.spring3.HelloSpring1
package spring3;

public class HelloSpring1 implements Hello {

	@Override
	public void sayHello(String name) {
		// TODO Auto-generated method stub
		System.out.println(name + "님 안녕하세요");
	}

}
SpringEx01.spring3.HelloSpring2
package spring3;

public class HelloSpring2 implements Hello {

	@Override
	public void sayHello(String name) {
		// TODO Auto-generated method stub
		System.out.println("Hi " + name);
	}

}
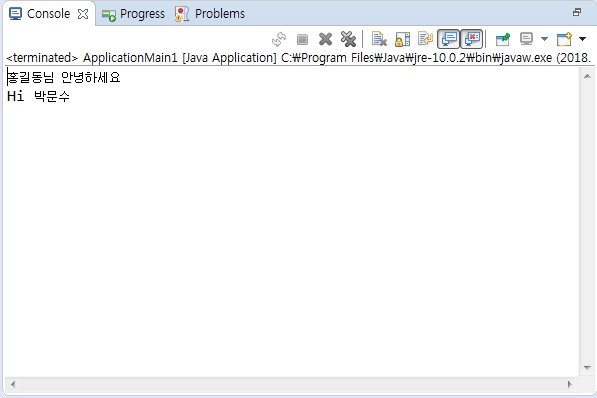
SpringEx01.spring3.ApplicationMain1
package spring3;

public class ApplicationMain1 {

	public static void main(String[] args) {
		// TODO Auto-generated method stub
		Hello hello = new HelloSpring1();

		// 다형성
		hello.sayHello("홍길동");
		hello = new HelloSpring2();
		hello.sayHello("박문수");
	}
}
스프링은 객체를 생성하고 연결해주는 DI 컨테이너
스프링은 객체를 생성하고 각 객체를 연결해주는 조립기 역할
GenericXmlApplicationContext가 조립기 기능을 구현한 클래스다.
이렇게 생성한 객체를 보관하기 때문에 스프링을 객체 컨테이너라고도 부른다
XML을 이용한 스프링 설정을 보면 컨테이너가 생성할 객체를 지정하기 위해 <bean> 태그를 사용 이를 스프링 빈 객체라고 부른다.
XML을 이용한 DI 설정
<bean> 태그를 이용해서 컨테이너가 생성할 빈 객체를 지정해주고, <property> 태그나 <constructor-arg> 태그를 이용해서 객체가 필요로 하는 값을 설정해주면 된다.
<bean> 태그 : 생성할 객체 지정
<bean> 태그의 주요 속성은 id와 class이다.
class 속성은 스프링 컨테이너가 생성할 객체의 클래스 이름을 값으로 갖는다.
id 속성으로 지정한 빈의 이름은 다른 <bean> 태그에서 참조할 때 사용
SpringEx01.spring3.context.xml - beans 파일 첨부
<?xml version="1.0" encoding="UTF-8"?>
<beans xmlns="http://www.springframework.org/schema/beans"
	xmlns:xsi="http://www.w3.org/2001/XMLSchema-instance"
	xsi:schemaLocation="http://www.springframework.org/schema/beans http://www.springframework.org/schema/beans/spring-beans-4.3.xsd">

	<bean name="hello1" class="spring3.HelloSpring1" />
	<bean id="hello2" class="spring3.HelloSpring2" />
</beans>
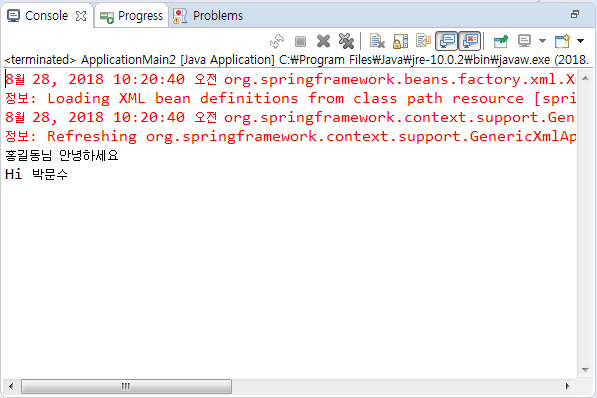
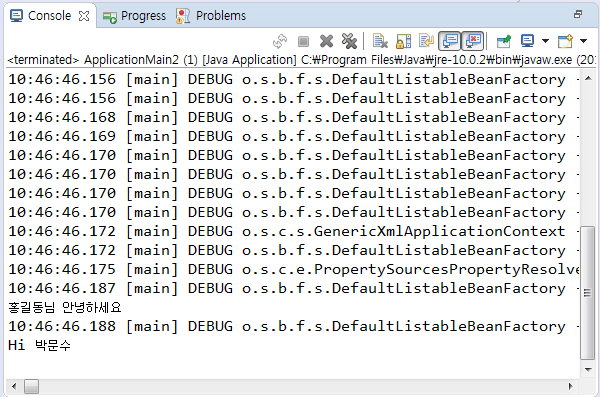
SpringEx01.spring3.ApplicationMain2
package spring3;

import org.springframework.context.support.GenericXmlApplicationContext;

public class ApplicationMain2 {

	public static void main(String[] args) {
		// TODO Auto-generated method stub
		GenericXmlApplicationContext ctx
			= new GenericXmlApplicationContext("classpath:spring3/context.xml");

		// new - xml에 조립 -> 주입

		Hello hello = (Hello)ctx.getBean("hello1");
		hello.sayHello("홍길동");
		hello = (Hello)ctx.getBean("hello2");
		hello.sayHello("박문수");
	}
}
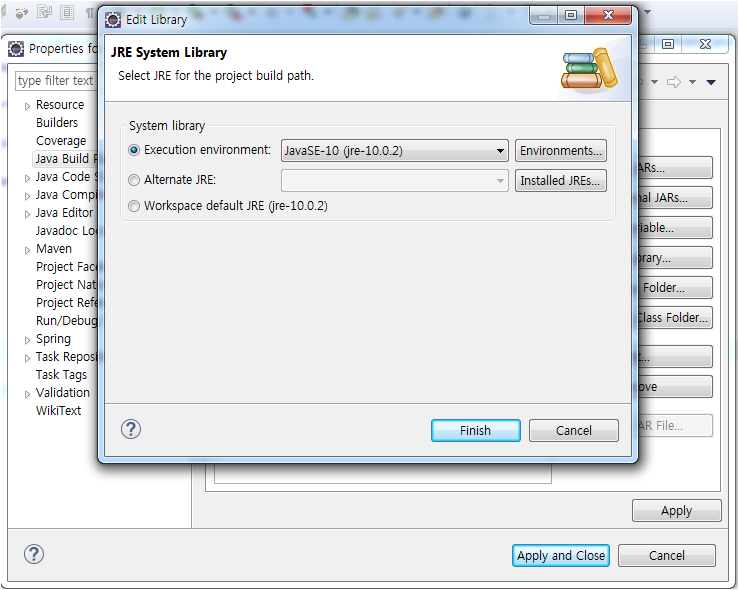
JavaSe-1.5에서 10으로 바꿀려면 위와 같이 설정해주면 된다
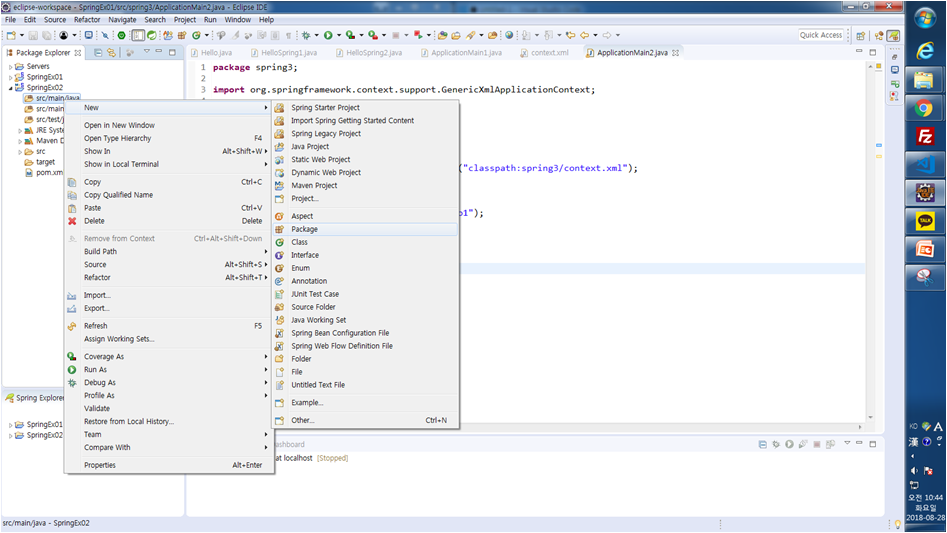
메이븐 프로젝트 의존 설정
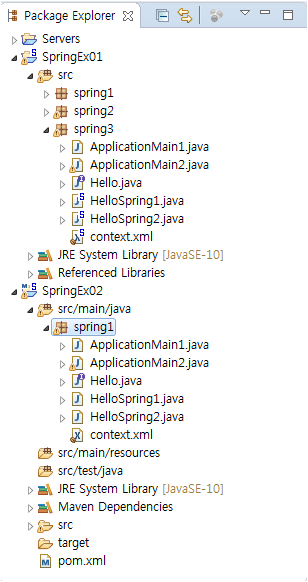
SpringEx02.spring1.context
<?xml version="1.0" encoding="UTF-8"?>
<beans xmlns="http://www.springframework.org/schema/beans"
	xmlns:xsi="http://www.w3.org/2001/XMLSchema-instance"
	xsi:schemaLocation="http://www.springframework.org/schema/beans http://www.springframework.org/schema/beans/spring-beans-4.3.xsd">

	<bean name="hello1" class="spring1.HelloSpring1" />
	<bean id="hello2" class="spring1.HelloSpring2" />
</beans>
SpringEx02.spring1.ApplicationMain2
package spring1;

import org.springframework.context.support.GenericXmlApplicationContext;

public class ApplicationMain2 {

	public static void main(String[] args) {
		// TODO Auto-generated method stub
		GenericXmlApplicationContext ctx
			= new GenericXmlApplicationContext("classpath:spring1/context.xml");

		// new - xml에 조립 -> 주입

		Hello hello = (Hello)ctx.getBean("hello1");
		hello.sayHello("홍길동");
		hello = (Hello)ctx.getBean("hello2");
		hello.sayHello("박문수");
	}
}
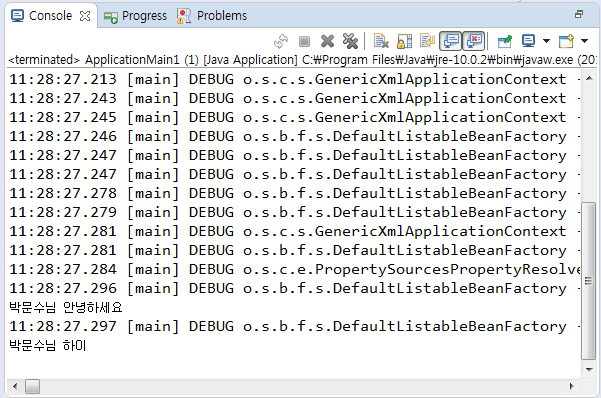
SpringEx02.spring1.ApplicationMain3
package spring1;

import org.springframework.context.support.GenericXmlApplicationContext;

public class ApplicationMain3 {

	public static void main(String[] args) {
		// TODO Auto-generated method stub
		GenericXmlApplicationContext ctx
		= new GenericXmlApplicationContext("classpath:spring1/context.xml");

		// new - xml에 조립 -> 주입

		Hello hello1 = (Hello)ctx.getBean("hello1");
		hello1.sayHello("홍길동");
		System.out.println(hello1);

		Hello hello2 = (Hello)ctx.getBean("hello1");
		hello2.sayHello("박문수");
		System.out.println(hello2);

		Hello hello3 = (Hello)ctx.getBean("hello2");
		System.out.println(hello3);
		Hello hello4 = (Hello)ctx.getBean("hello2");
		System.out.println(hello4);
	}
}
prototype - 매번 새로 생성
singleton - static : 한번 만들어진 것을 재활용
SpringEx02.spring1.context
<?xml version="1.0" encoding="UTF-8"?>
<beans xmlns="http://www.springframework.org/schema/beans"
	xmlns:xsi="http://www.w3.org/2001/XMLSchema-instance"
	xsi:schemaLocation="http://www.springframework.org/schema/beans http://www.springframework.org/schema/beans/spring-beans-4.3.xsd">
	<!-- prototype : 매번 새로 생성 -->
	<bean name="hello1" class="spring1.HelloSpring1" scope="prototype"/>
	<!-- singleton : 한번 만든걸 재활용 -->
	<bean id="hello2" class="spring1.HelloSpring2" scope="singleton"/>
</beans>
prototype

singleton

생성자 방식과 프로퍼티 설정 방식
DI에서 의존 객체를 전달하는 방법은 크게 생성자 방식과 프로퍼티 설정 방식으로 구분된다. 생성자 방식은 앞서 살펴봤듯이 생성자를 통해서 의존하는 객체를 전달받는 방식이다.
프로퍼티 설정 방식은 의존 객체를 전달받기 위해 메서드를 이용한다.
SpringEx02.spring2.HelloInter
package spring2;

public interface HelloInter {
	public abstract void sayHello();
	public abstract void sayHello(String name);
}
SpringEx02.spring2.HelloSpring
package spring2;

public class HelloSpring implements HelloInter {
	private String name ;

	public HelloSpring(String name) {
		// TODO Auto-generated constructor stub
		this.name = name;
	}

	@Override
	public void sayHello() {
		// TODO Auto-generated method stub
		// 생성자를 통해서 들어온 name
		System.out.println(name + "님 안녕하세요");
	}

	@Override
	public void sayHello(String name) {
		// TODO Auto-generated method stub
		System.out.println(name + "님 하이");
	}
}
<constructor-arg> 태그 : 생성자 방식 설정
<constructor-arg> 태그의 순서가 곧 전달될 파라미터의 순서가 된다.
<constructor-arg> 태그는 <value> 태그를 이용해서 값을 지정
SpringEx02.spring2.context
<?xml version="1.0" encoding="UTF-8"?>
<beans xmlns="http://www.springframework.org/schema/beans"
	xmlns:xsi="http://www.w3.org/2001/XMLSchema-instance"
	xsi:schemaLocation="http://www.springframework.org/schema/beans http://www.springframework.org/schema/beans/spring-beans-4.3.xsd">
	<!-- HelloSpring의 constructor를 부른다. 즉 여기 홍길동이 constructor에 있는 name이 됨 -->
	<!-- 생성자 주입 -->
	<bean id="hello" class="spring2.HelloSpring" >
		<!--
		<constructor-arg>
			<value>홍길동</value>
		</constructor-arg>
		 -->
		 <constructor-arg value="박문수" />
	</bean>
</beans>
SpringEx02.spring2.ApplicationMain1
package spring2;

import org.springframework.context.support.GenericXmlApplicationContext;

public class ApplicationMain1 {

	public static void main(String[] args) {
		// TODO Auto-generated method stub
		GenericXmlApplicationContext ctx
			= new GenericXmlApplicationContext("classpath:spring2/context.xml");

		HelloInter hello = (HelloInter)ctx.getBean("hello");
		hello.sayHello();
		hello = (HelloInter)ctx.getBean("hello");
		hello.sayHello("박문수");
	}
}
SpringEx02.spring2.HelloSpring - name이 1, 2로 두개가 있을 때
package spring2;

public class HelloSpring implements HelloInter {
	private String name1;
	private String name2;

	public HelloSpring(String name1, String name2) {
		// TODO Auto-generated constructor stub
		this.name1 = name1;
		this.name2 = name2;
	}

	@Override
	public void sayHello() {
		// TODO Auto-generated method stub
		// 생성자를 통해서 들어온 name
		System.out.println(name1 + "님 안녕하세요");
		System.out.println(name2 + "님 안녕하세요");
	}

	@Override
	public void sayHello(String name) {
		// TODO Auto-generated method stub
		System.out.println(name + "님 하이");
	}
}
SpringEx02.spring2.context
<?xml version="1.0" encoding="UTF-8"?>
<beans xmlns="http://www.springframework.org/schema/beans"
	xmlns:xsi="http://www.w3.org/2001/XMLSchema-instance"
	xsi:schemaLocation="http://www.springframework.org/schema/beans http://www.springframework.org/schema/beans/spring-beans-4.3.xsd">
	<!-- HelloSpring의 constructor를 부른다. 즉 여기 홍길동이 constructor에 있는 name이 됨 -->
	<!-- 생성자 주입 -->
	<bean id="hello" class="spring2.HelloSpring" >
		<constructor-arg>
			<value >홍길동</value>
		</constructor-arg>
		<constructor-arg>
			<value >박문수</value>
		</constructor-arg>
		<!-- <constructor-arg value="박문수"/> -->
	</bean>
</beans>
context안에서 constructor-arg 태그를 나란히 두번 써주면 됨

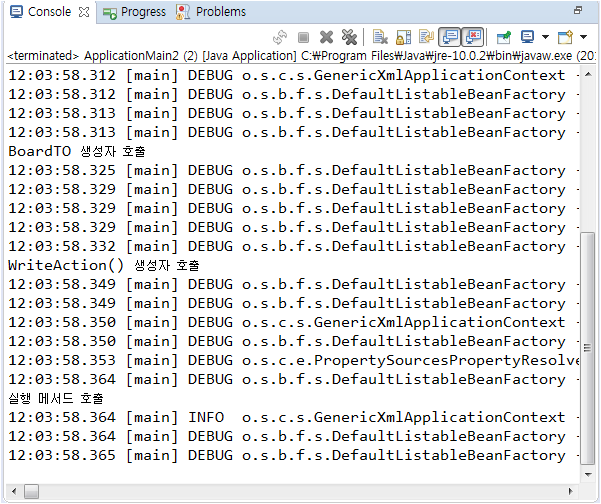
Spring2.spring3.BoardTO
package spring3;

public class BoardTO {
	public BoardTO() {
		// TODO Auto-generated constructor stub
		System.out.println("BoardTO 생성자 호출");
	}
}
Spring2.spring3.WriteAction
package spring3;

public class WriteAction {
	public WriteAction(BoardTO to) {
		// TODO Auto-generated constructor stub
		System.out.println("WriteAction() 생성자 호출");
	}

	public void execute() {
		System.out.println("실행 메서드 호출");
	}
}
Spring2.spring3.ApplicationMain1
package spring3;
public class ApplicationMain1 {
public static void main(String[] args) {
// TODO Auto-generated method stub
BoardTO to = new BoardTO(); // 첫번째
WriteAction action = new WriteAction(to); // 두번째 - WriteAction 인자에 BoardTO to를 받아와야 하기 때문
action.execute();
}
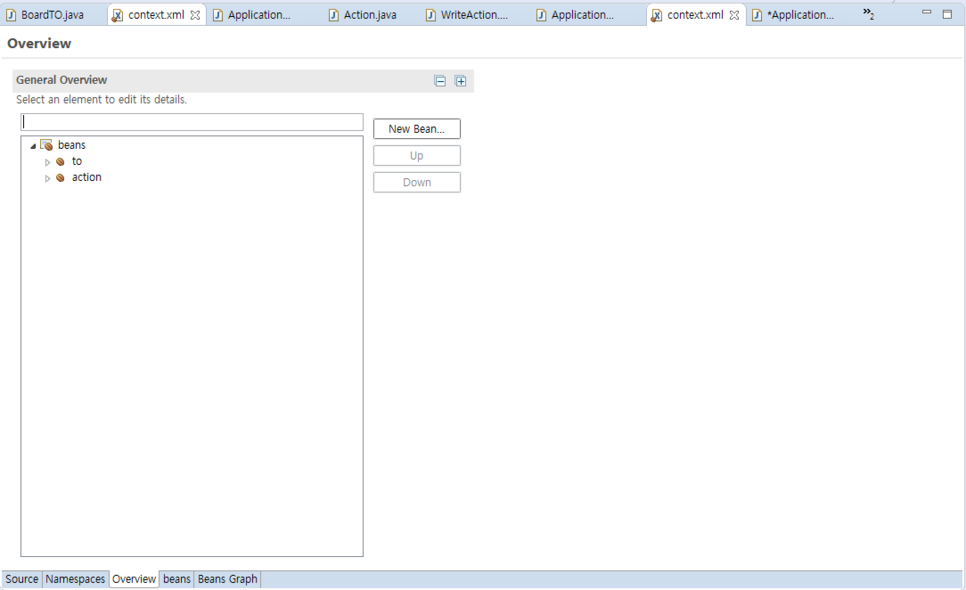
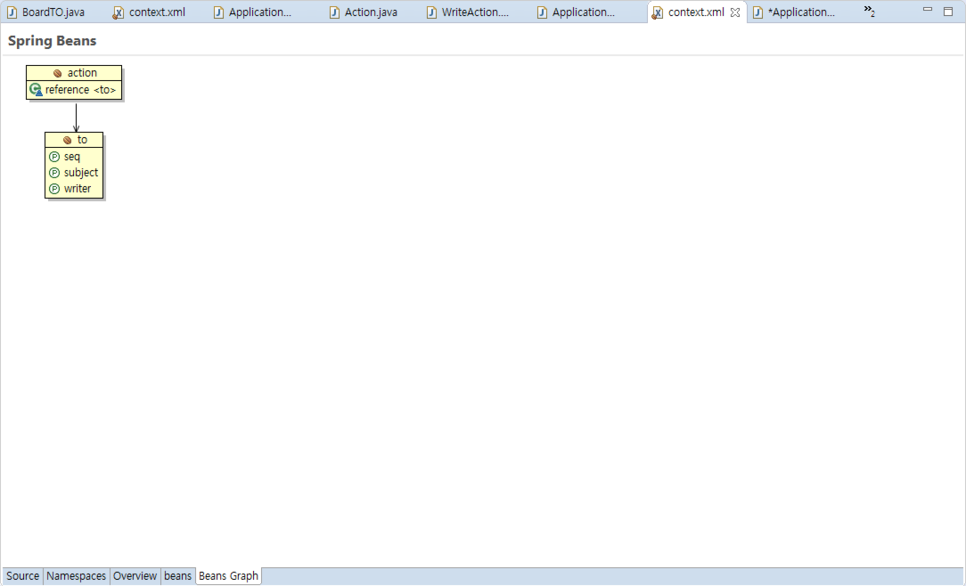
}<constructor-arg> 태그에서 <ref>태그는 다른 빈 객체를 사용하는 경우에 사용한다.
Spring2.spring3.context
<?xml version="1.0" encoding="UTF-8"?>
<beans xmlns="http://www.springframework.org/schema/beans"
	xmlns:xsi="http://www.w3.org/2001/XMLSchema-instance"
	xsi:schemaLocation="http://www.springframework.org/schema/beans http://www.springframework.org/schema/beans/spring-beans-4.3.xsd">

	<bean id="to" class="spring3.BoardTO" />
	<bean id="action" class="spring3.WriteAction">
		<constructor-arg>
			<ref bean="to"/>
		</constructor-arg>
	</bean>
</beans>
Spring2.spring3.ApplicationMain2
package spring3;

import org.springframework.context.support.GenericXmlApplicationContext;

public class ApplicationMain2 {

	public static void main(String[] args) {
		// TODO Auto-generated method stub
		GenericXmlApplicationContext ctx
			= new GenericXmlApplicationContext("classpath:spring3/context.xml");

		WriteAction action = (WriteAction)ctx.getBean("action");
		action.execute();

		ctx.close();
	}
}
PropertyEx01.spring1.BoardTO
package spring1;

public class BoardTO {
	private int seq;
	private String subject;

	public int getSeq() {
		return seq;
	}
	public void setSeq(int seq) {
		this.seq = seq;
	}
	public String getSubject() {
		return subject;
	}
	public void setSubject(String subject) {
		this.subject = subject;
	}
}
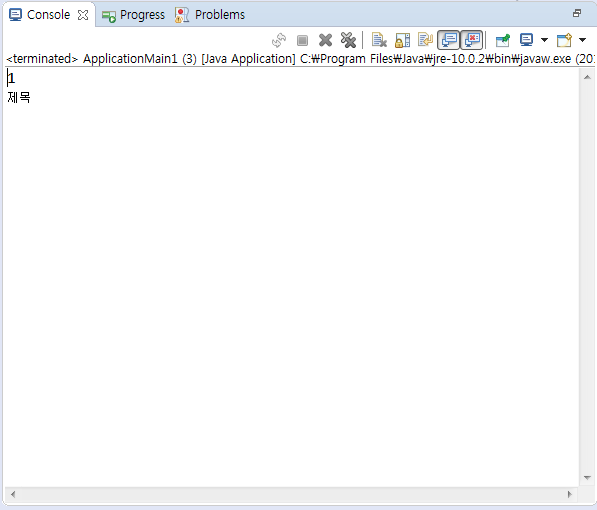
PropertyEx01.spring1.ApplicationMain1
package spring1;

public class ApplicationMain1 {

	public static void main(String[] args) {
		// TODO Auto-generated method stub
		BoardTO to = new BoardTO();

		to.setSeq(1);
		to.setSubject("제목");

		System.out.println(to.getSeq());
		System.out.println(to.getSubject());
	}
}
<property> 태그 : 프로퍼티 방식 설정
name 속성을 이용해서 프로퍼티 이름을 지정한다.
프로퍼티의 값은 <value> 태그 또는 value 속성 그리고 <ref> 태그 또는 ref 속성을 이용해서 값을 설정할 수 있다.
GenericXmlApplicationContext로 예제 실행
XML 설정은 context.xml 파일이다.
생성자를 호출할 때 "classpath:context.xml"을 파라미터로 전달했는데, 이는 클래스패스에 위치한 context.xml 파일을 스프링 설정으로 사용한다는 것을 의미. 설정 파일을 이용해서 스프링 컨테이너를 생성했다면, 그 다음으로 getBean() 메서드를 이용해서 빈 객체를 구할 수 있다.
PropertyEx01.spring1.context
<?xml version="1.0" encoding="UTF-8"?>
<beans xmlns="http://www.springframework.org/schema/beans"
	xmlns:xsi="http://www.w3.org/2001/XMLSchema-instance"
	xsi:schemaLocation="http://www.springframework.org/schema/beans http://www.springframework.org/schema/beans/spring-beans-4.3.xsd">

	<bean id="to" class="spring1.BoardTO">
		<property name="seq" value="1"></property>
		<property name="subject" value="제목"></property>
	</bean>
</beans>
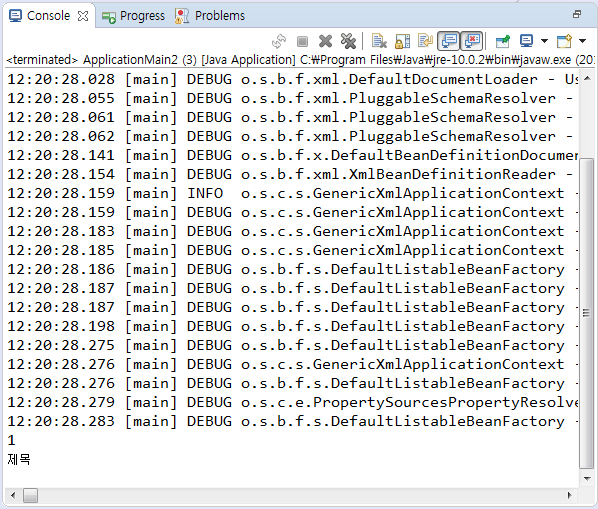
PropertyEx01.spring1.ApplicationMain2
package spring1;

import org.springframework.context.support.GenericXmlApplicationContext;

public class ApplicationMain2 {

	public static void main(String[] args) {
		// TODO Auto-generated method stub
		GenericXmlApplicationContext ctx
			= new GenericXmlApplicationContext("classpath:spring1/context.xml");

		BoardTO to = (BoardTO)ctx.getBean("to");

		System.out.println(to.getSeq());
		System.out.println(to.getSubject());
	}
}
PropertyEx01.spring1.ApplicationMain2
package spring1;

import org.springframework.context.support.GenericXmlApplicationContext;

public class ApplicationMain2 {

	public static void main(String[] args) {
		// TODO Auto-generated method stub
		GenericXmlApplicationContext ctx
			= new GenericXmlApplicationContext("classpath:spring1/context.xml");

		BoardTO to = (BoardTO)ctx.getBean("to");

		System.out.println(to.getSeq());
		System.out.println(to.getSubject());

		to.setSeq(10);
		System.out.println(to.getSeq());

		ctx.close();
	}
}
ApplicationMain2에서 seq값을 변경시켜줘도 바로 적용된다.
PropertyEx01.spring2.BoardTO
package spring2;

public class BoardTO {
	private String seq;
	private String subject;
	private String writer;

	public String getSeq() {
		return seq;
	}
	public void setSeq(String seq) {
		this.seq = seq;
	}
	public String getSubject() {
		return subject;
	}
	public void setSubject(String subject) {
		this.subject = subject;
	}
	public String getWriter() {
		return writer;
	}
	public void setWriter(String writer) {
		this.writer = writer;
	}
}
PropertyEx01.spring2.Action - 인터페이스
package spring2;

public interface Action {
	public void execute();
}
PropertyEx01.spring2.WriteAction
package spring2;
public class WriteAction implements Action {
private BoardTO to;
public WriteAction(BoardTO to) {
// TODO Auto-generated constructor stub
this.to = to;
}
@Override
public void execute() {
// TODO Auto-generated method stub
System.out.println(to.getSeq());
System.out.println(to.getSubject());
System.out.println(to.getWriter());
}
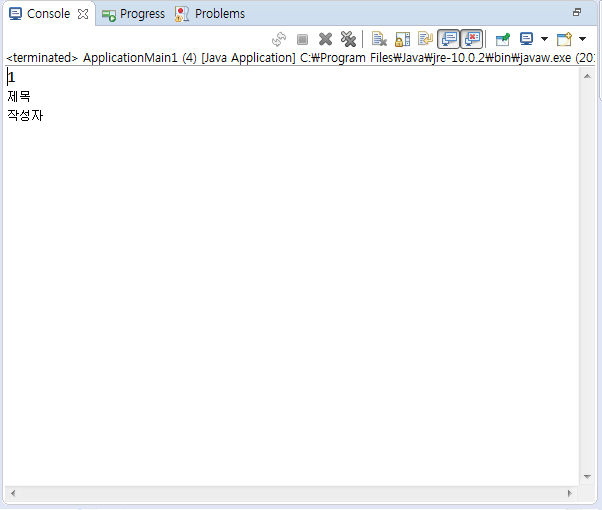
}PropertyEx01.spring2.ApplicationMain1
package spring2;

public class ApplicationMain1 {

	public static void main(String[] args) {
		// TODO Auto-generated method stub
		BoardTO to = new BoardTO();
		to.setSeq("1");
		to.setSubject("제목");
		to.setWriter("작성자");

		Action action = new WriteAction(to);
		action.execute();
	}
}
PropertyEx01.spring2.context
<?xml version="1.0" encoding="UTF-8"?>
<beans xmlns="http://www.springframework.org/schema/beans"
	xmlns:xsi="http://www.w3.org/2001/XMLSchema-instance"
	xsi:schemaLocation="http://www.springframework.org/schema/beans http://www.springframework.org/schema/beans/spring-beans-4.3.xsd">

	<bean id="to" class="spring2.BoardTO">
		<property name="seq" value="1"/>
		<property name="subject" value="제목"/>
		<property name="writer" value="작성자"/>
	</bean>

	<bean id="action" class="spring2.WriteAction">
		<constructor-arg>
			<ref bean="to"/>
		</constructor-arg>
	</bean>
</beans>
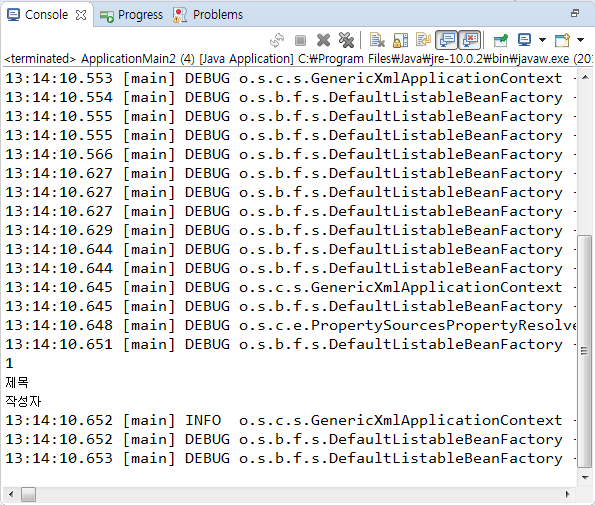
PropertyEx01.spring2.ApplicationMain2
<?xml version="1.0" encoding="UTF-8"?>
<beans xmlns="http://www.springframework.org/schema/beans"
	xmlns:xsi="http://www.w3.org/2001/XMLSchema-instance"
	xsi:schemaLocation="http://www.springframework.org/schema/beans http://www.springframework.org/schema/beans/spring-beans-4.3.xsd">

	<bean id="to" class="spring2.BoardTO">
		<property name="seq" value="1"/>
		<property name="subject" value="제목"/>
		<property name="writer" value="작성자"/>
	</bean>

	<bean id="action" class="spring2.WriteAction">
		<constructor-arg>
			<ref bean="to"/>
		</constructor-arg>
	</bean>
</beans>
List, Map, Set 타입의 콜렉션 설정
자바 콜렉션 타입 중 List, Map, Set 콜렉션에 대해 값을 설정할 때에는 각각 <list> 태그, <map> 태그, <set> 태그를 사용한다.
PropertyEx01.spring3.BoardTO
package spring3;

public class BoardTO {
	private String seq;
	private String subject;
	private String writer;

	public String getSeq() {
		return seq;
	}
	public void setSeq(String seq) {
		this.seq = seq;
	}
	public String getSubject() {
		return subject;
	}
	public void setSubject(String subject) {
		this.subject = subject;
	}
	public String getWriter() {
		return writer;
	}
	public void setWriter(String writer) {
		this.writer = writer;
	}
}
PropertyEx01.spring3.BoardListTO
package spring3;

import java.util.ArrayList;

public class BoardListTO {
	private ArrayList<String> users;
	private ArrayList<BoardTO> boards;

	public ArrayList<String> getUsers() {
		return users;
	}
	public void setUsers(ArrayList<String> users) {
		this.users = users;
	}
	public ArrayList<BoardTO> getBoards() {
		return boards;
	}
	public void setBoards(ArrayList<BoardTO> boards) {
		this.boards = boards;
	}
}
PropertyEx01.spring3.ApplicationMain1
package spring3;

import java.util.ArrayList;

public class ApplicationMain1 {

	public static void main(String[] args) {
		// TODO Auto-generated method stub
		ArrayList<String> users = new ArrayList<>();
		users.add("홍길동");
		users.add("박문수");

		BoardListTO listTO = new BoardListTO();
		listTO.setUsers(users);

		for(String user : listTO.getUsers()) {
			System.out.println(user);
		}

		BoardTO to1 = new BoardTO();
		to1.setSeq("1");
		to1.setSubject("제목 1");
		to1.setWriter("작성자 1");

		BoardTO to2 = new BoardTO();
		to2.setSeq("2");
		to2.setSubject("제목 2");
		to2.setWriter("작성자 2");

		ArrayList<BoardTO> boardList = new ArrayList<>();
		boardList.add(to1);
		boardList.add(to2);

		listTO.setBoards(boardList);

		for(BoardTO to : listTO.getBoards()) {
			System.out.println(to.getSeq());
			System.out.println(to.getSubject());
			System.out.println(to.getWriter());
		}
	}
}
PropertyEx01.spring3.context
<?xml version="1.0" encoding="UTF-8"?>
<beans xmlns="http://www.springframework.org/schema/beans"
xmlns:xsi="http://www.w3.org/2001/XMLSchema-instance"
xsi:schemaLocation="http://www.springframework.org/schema/beans http://www.springframework.org/schema/beans/spring-beans-4.3.xsd">
<bean id="to1" class="spring3.BoardTO">
<property name="seq" value="1" />
<property name="subject" value="제목1" />
<property name="writer" value="작성자1" />
</bean>
<bean id="to2" class="spring3.BoardTO">
<property name="seq" value="2" />
<property name="subject" value="제목2" />
<property name="writer" value="작성자2" />
</bean>
<bean id="listTO" class="spring3.BoardListTO">
<property name="users">
<list>
<value>홍길동</value>
<value>박문수</value>
</list>
</property>
<property name="boards">
<list>
<ref bean="to1"/>
<ref bean="to2"/>
</list>
</property>
</bean>
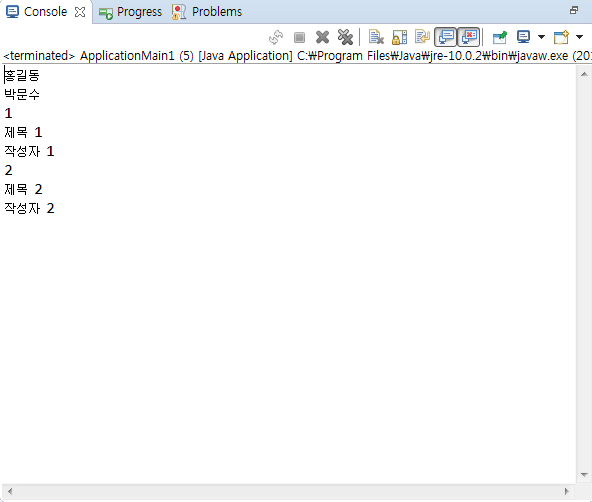
</beans>PropertyEx01.spring3.ApplicationMain2
package spring3;

import org.springframework.context.support.GenericXmlApplicationContext;

public class ApplicationMain2 {

	public static void main(String[] args) {
		GenericXmlApplicationContext ctx
		= new GenericXmlApplicationContext("classpath:spring3/context.xml");

		BoardListTO listTO = (BoardListTO)ctx.getBean("listTO");
		for(String user : listTO.getUsers()) {
			System.out.println(user);
		}

		for(BoardTO to : listTO.getBoards()) {
			System.out.println(to.getSeq());
			System.out.println(to.getSubject());
			System.out.println(to.getWriter());
		}
	}
}
PropertyEx01.spring4.BoardTO
package spring4;

public class BoardTO {
	private String seq;
	private String subject;
	private String writer;

	public String getSeq() {
		return seq;
	}
	public void setSeq(String seq) {
		this.seq = seq;
	}
	public String getSubject() {
		return subject;
	}
	public void setSubject(String subject) {
		this.subject = subject;
	}
	public String getWriter() {
		return writer;
	}
	public void setWriter(String writer) {
		this.writer = writer;
	}
}
PropertyEx01.spring4.context
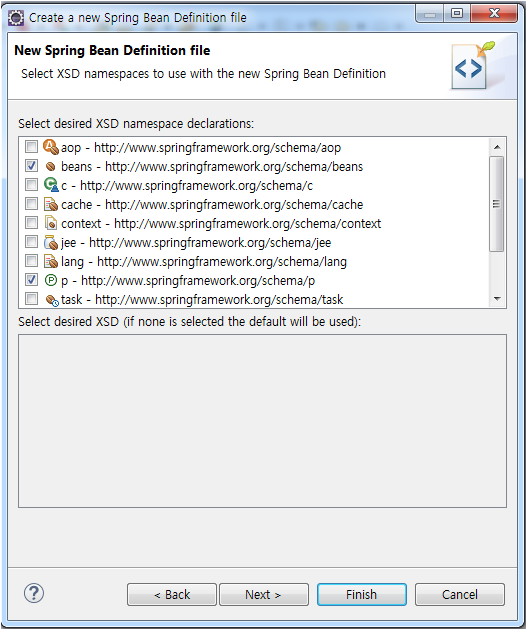
c 네임스페이스와 p 네임스페이스를 생성자 방식/프로퍼티 방식 설정
기본 데이터 타이븡ㄹ 설정할 때에는 "c:파라미터이름-ref" 속성을 사용하여 빈 객체를 생성자 파라미터로 전달할 수 있다.
프로퍼티 값을 설정할 때는 "p:프로퍼티이름-ref" 속성을 사용하여 빈 객체를 프로퍼티에 전달할 수 있다.
context를 만들 때 beans랑 p(property)를 선택해준다
<?xml version="1.0" encoding="UTF-8"?>
<beans xmlns="http://www.springframework.org/schema/beans"
	xmlns:xsi="http://www.w3.org/2001/XMLSchema-instance"
	xmlns:p="http://www.springframework.org/schema/p"
	xsi:schemaLocation="http://www.springframework.org/schema/beans http://www.springframework.org/schema/beans/spring-beans-4.3.xsd">

	<bean id="to" class="spring4.BoardTO" p:seq="1" p:subject="제목1" p:writer="작성자1" />
</beans>
PropertyEx01.spring4.ApplicationMain1
package spring4;

import org.springframework.context.support.GenericXmlApplicationContext;

public class ApplicationMain1 {

	public static void main(String[] args) {
		// TODO Auto-generated method stub
		GenericXmlApplicationContext ctx
		= new GenericXmlApplicationContext("classpath:spring4/context.xml");

		BoardTO to = (BoardTO)ctx.getBean("to");

		System.out.println(to.getSeq());
		System.out.println(to.getSubject());
		System.out.println(to.getWriter());

		ctx.close();
	}
}
context.xml이란 xml형태로 만들었는데 이걸 class파일로 만드는 어노테이션 기법 사용해보자
SpringEx03.spring1.Action - 인터페이스
package spring1;

public interface Action {
	public abstract void execute(String name);
}
SpringEx03.spring1.WriteAction
package spring1;

public class WriteAction implements Action {
	public WriteAction() {
		// TODO Auto-generated constructor stub
		System.out.println("WriteAction() 호출");
	}

	@Override
	public void execute(String name) {
		// TODO Auto-generated method stub
		System.out.println(name + " 글쓰기");
	}
}
SpringEx03.spring1.ListAction
package spring1;

public class ListAction implements Action {
	public ListAction() {
		// TODO Auto-generated constructor stub
		System.out.println("ListAction() 호출");
	}

	@Override
	public void execute(String name) {
		// TODO Auto-generated method stub
		System.out.println(name + " 글목록");
	}
}
@Configuration과 @Bean을 이용한 빈 객체 설정
자바 코드를 이용한 설정은 XML을 이용한 설정보다 더 직관적이다. 스프링이 자바 코드를 스프링 설정 정보로 사용하도록 하려면 다음과 같이 @Configuration 애노테이션과 @Bean 애노테이션을 사용하면 된다.
스프링은 @Configuration 애노테이션이 붙은 클래스를 설정 정보로 사용한다. 스프링이 제공할 빈 객체는 @Bean 애노테이션을 이용해서 지정한다.
@Bean 애노테이션은 빈 객체를 생성하는 메서드에 적용된다.
SpringEx03.spring1.BeanConfig
package spring1;

import org.springframework.context.annotation.Bean;
import org.springframework.context.annotation.Configuration;

@Configuration
public class BeanConfig {

	@Bean
	public WriteAction action1() {
		return new WriteAction();
	}

	@Bean
	public ListAction action2() {
		return new ListAction();
	}
}
SpringEx03.spring1.ApplicationMain
package spring1;
import org.springframework.context.annotation.AnnotationConfigApplicationContext;
public class ApplicationMain {
public static void main(String[] args) {
// TODO Auto-generated method stub
AnnotationConfigApplicationContext ctx
= new AnnotationConfigApplicationContext(BeanConfig.class);
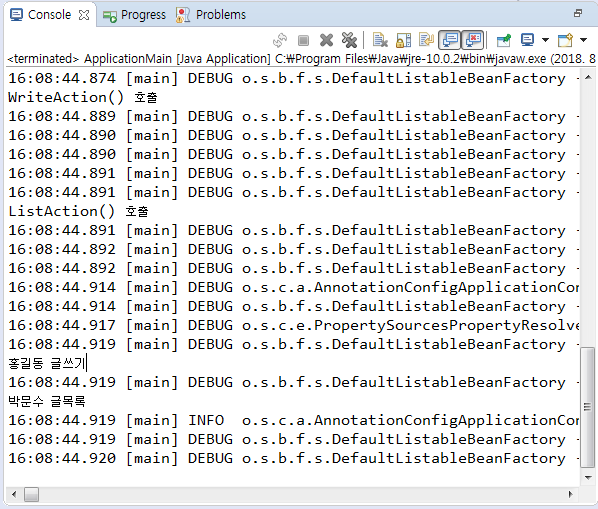
WriteAction action1 = (WriteAction)ctx.getBean("action1");
action1.execute("홍길동");
ListAction action2 = (ListAction)ctx.getBean("action2");
action2.execute("박문수");
ctx.close();
}
}
빈 객체의 식별값으로 메서드 이름이 아닌 다른 이름을 사용하고 싶다면 @Bean 애노테이션의 name 속성을 사용하면 된다.
SpringEx03.spring1.BeanConfig
package spring1;

import org.springframework.context.annotation.Bean;
import org.springframework.context.annotation.Configuration;

@Configuration
public class BeanConfig {

	@Bean
	public WriteAction action1() {
		return new WriteAction();
	}

	@Bean
	public ListAction action2() {
		return new ListAction();
	}

	@Bean(name="listAction")
	public ListAction action3() {
		return new ListAction();
	}

}
Bean에 이름을 지정하여 action3가 아닌 listAction으로 지정하여 사용할 수 있다.
SpringEx03.spring1.ApplicationMain
package spring1;

import org.springframework.context.annotation.AnnotationConfigApplicationContext;

public class ApplicationMain {

	public static void main(String[] args) {
		// TODO Auto-generated method stub
		AnnotationConfigApplicationContext ctx
			= new AnnotationConfigApplicationContext(BeanConfig.class);

		Action action1 = (Action)ctx.getBean("action1");
		action1.execute("홍길동");

		Action action2 = (Action)ctx.getBean("action2");
		action2.execute("박문수");

		Action listAction = (Action)ctx.getBean("listAction");
		listAction.execute("방자");

		ctx.close();
	}
}
생성자로
SpringEx03.spring1.WriteAction
package spring1;

public class WriteAction implements Action {
	public WriteAction() {
		// TODO Auto-generated constructor stub
		System.out.println("WriteAction() 호출");
	}

	public WriteAction(String name) {
		// TODO Auto-generated constructor stub
		System.out.println("WriteAction() 호출 " + name);
	}

	@Override
	public void execute(String name) {
		// TODO Auto-generated method stub
		System.out.println(name + " 글쓰기");
	}
}
SpringEx03.spring1.BeanConfig
package spring1;
import org.springframework.context.annotation.Bean;
import org.springframework.context.annotation.Configuration;
@Configuration
public class BeanConfig {
@Bean
public WriteAction action1() {
return new WriteAction();
}
@Bean
public ListAction action2() {
return new ListAction();
}
@Bean(name="listAction")
public ListAction action3() {
return new ListAction();
}
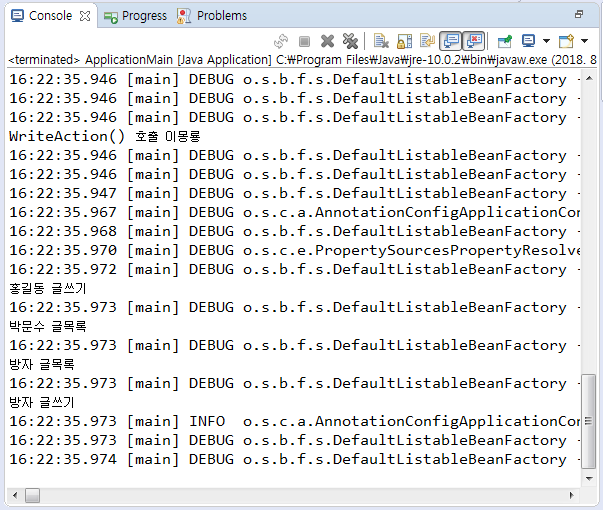
@Bean(name="writeAction")
public WriteAction action4() {
//return new WriteAction("이몽룡");
WriteAction action = new WriteAction("이몽룡");
return action;
}
}AnnotationConfigApplicationContext를 이용한 자바 코드 설정 사용
AnnotationConfigApplicationContext 클래스는 생성자로 전달받은 클래스 정보를 분석해서 스프링 컨테이너가 제공할 빈 객체를 초기화한다. 초기화 과정이 끝나면 getBean() 메서드를 이용해서 빈 객체를 사용할 수 있다.
SpringEx03.spring1.ApplicationMain
package spring1;

import org.springframework.context.annotation.AnnotationConfigApplicationContext;

public class ApplicationMain {

	public static void main(String[] args) {
		// TODO Auto-generated method stub
		AnnotationConfigApplicationContext ctx
			= new AnnotationConfigApplicationContext(BeanConfig.class);

		Action action1 = (Action)ctx.getBean("action1");
		action1.execute("홍길동");

		Action action2 = (Action)ctx.getBean("action2");
		action2.execute("박문수");

		Action listAction = (Action)ctx.getBean("listAction");
		listAction.execute("방자");

		Action writeAction = (Action)ctx.getBean("writeAction");
		writeAction.execute("방자");

		ctx.close();
	}
}
'Web & Mobile > Spring' 카테고리의 다른 글
| Lecture 76 - Spring(6) Model2 게시판을 Spring으로, 전자정부프레임워크 설정법, 전자정부프레임워크 모바일 (0) | 2019.07.05 |
|---|---|
| Lecture 75 - Spring(5) Spring MVC 게시판(2), Maven (0) | 2019.07.04 |
| Lecture 74 - Spring(4) AOP, Spring MVC 게시판 (0) | 2019.07.02 |
| Lecture 73 - Spring(3) 스프링 게시판 (0) | 2019.07.01 |
| Lecture 71 - Spring(1) 스프링 프레임워크 설치법, (0) | 2019.06.27 |


댓글