추상클래스(abstract class)
클래스를 설계도에 비유한다면, 추상클래스는 미완성 설계도에 비유할 수 있다. 미완성 설계도란, 단어의 뜻 그대로 완성되지 못한 채로 남겨진 설계도를 말한다.
클래스가 미완성이라는 것은 멤버의 개수에 관계된 것이 아니라, 단지 미완성 메서드(추상메서드)를 포함하고 있다는 의미이다.
미완성 설계도로 완성된 제품을 만들 수 없듯이 추상클래스로 인스턴스는 생성할 수 없다. 추상클래스는 상속을 통해서 자손클래스에 의해서만 완성될 수 있다.
추상메서드(abstract method)
메서드는 선언부와 구현부(몸통)로 구성되어 있다고 했다. 선언부만 작성하고 구현부는 작성하지 않은 채로 남겨 둔 것이 추상메서드이다. 즉, 설계만 해 놓고 실제 수행될 내용은 작성하지 않았기 때문에 미완성 메서드인 것이다.
메서드를 이와 같이 미완성 상태로 남겨 놓는 이유는 메서드의 내용이 상속받는 클래스에 따라 달라질 수 있기 때문에 조상 클래스에서는 선언부만을 작성하고, 주석을 덧붙여 어떤 기능을 수행할 목적으로 작성되었는지 알려 주고, 실제 내용은 상속받는 클래스에서 구현하도록 비워 두는 것이다. 그래서 추상클래스를 상속받는 자손 클래스는 조상의 추상메서드를 상황에 맞게 적절히 구현해주어야 한다.
추상메서드 역시 키워드 'abstract'를 앞에 붙여 주고, 추상메서드는 구현부가 없으므로 괄호{} 대신 문장의 끝을 알리는 ';'을 적어준다.
abstract 리턴타입 메서드이름();
// 일반 클래스
class Person {

}

abstract class AbstractPerson {

}

public class PersonMain01{
    public static void main(String[] args) {
        Person p1 = new Person();
        AbstractPerson ap1 = new AbstractPerson();
    }
}
// 일반 클래스
class Person {
}
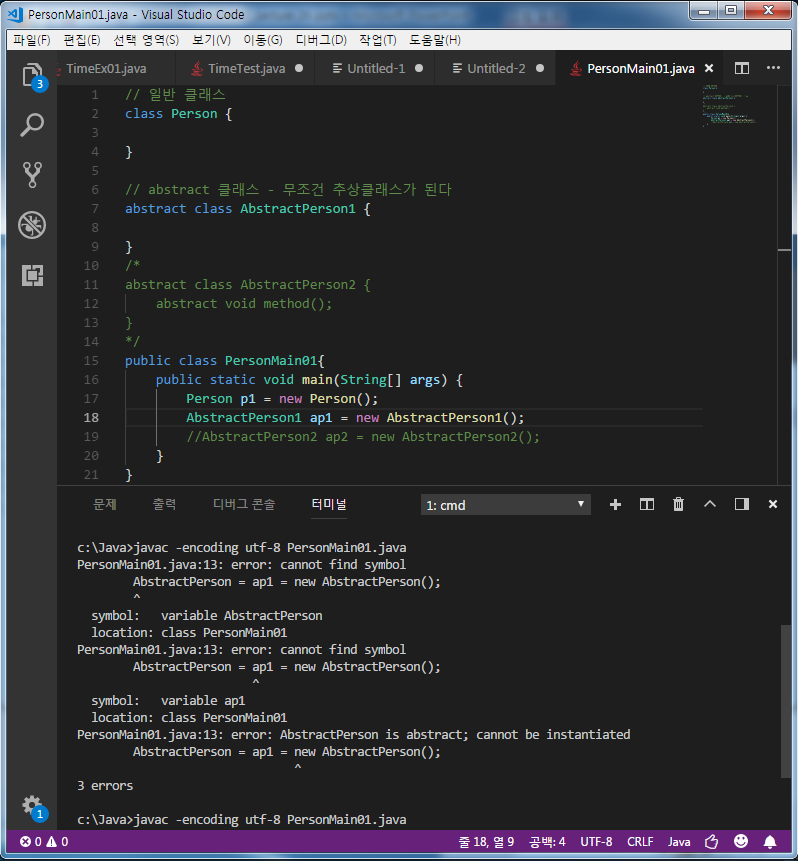
// abstract 클래스 - 무조건 추상클래스가 된다
abstract class AbstractPerson1 {
}
abstract class AbstractPerson2 {
abstract void method();
}
// 추상메서드 - body 없는 메서드
// abstract
public class PersonMain01{
public static void main(String[] args) {
Person p1 = new Person();
//AbstractPerson1 ap1 = new AbstractPerson1();
AbstractPerson2 ap2 = new AbstractPerson2();
}
}
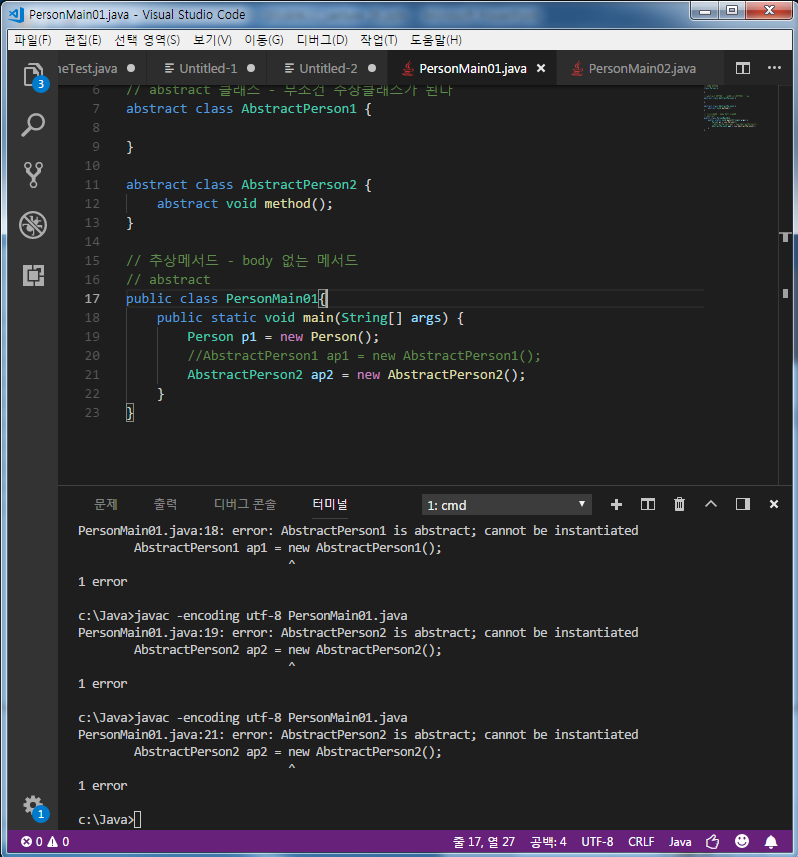
추상때문에 상속시키질 않았기에 에러 발생한다.
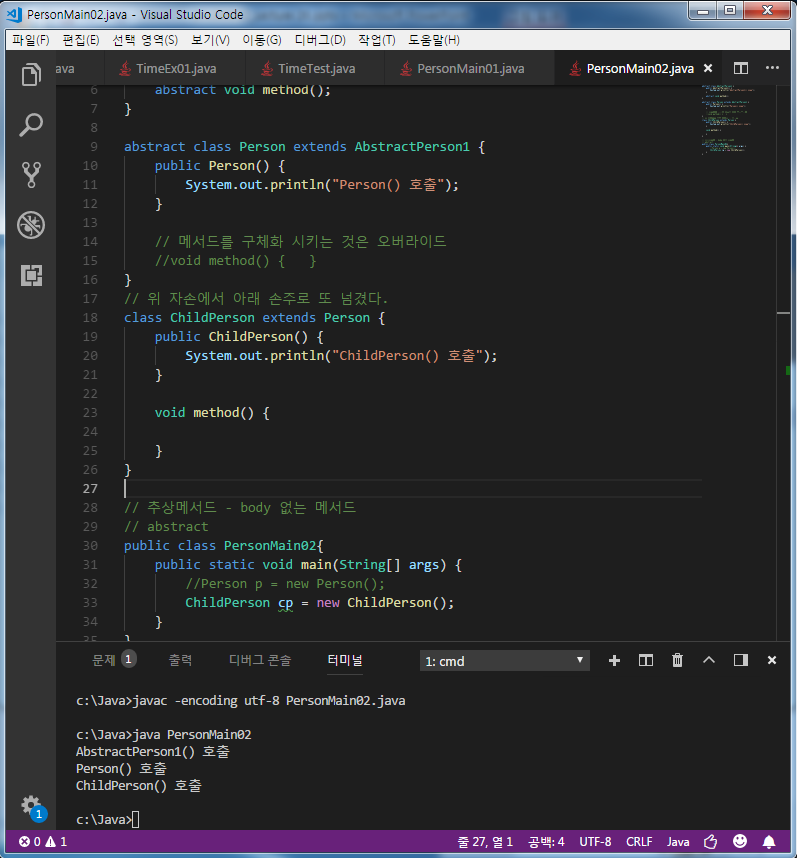
abstract class AbstractPerson1 {
    public AbstractPerson1() {
        System.out.println("AbstractPerson1() 호출");
    }

    abstract void method();
}

abstract class Person extends AbstractPerson1 {
    public Person() {
        System.out.println("Person() 호출");
    }

    // 메서드를 구체화 시키는 것은 오버라이드
    //void method() {   }
}
// 위 자손에서 아래 손주로 또 넘겼다.
class ChildPerson extends Person {
    public ChildPerson() {
        System.out.println("ChildPerson() 호출");
    }

    void method() {

    }
}

// 추상메서드 - body 없는 메서드
// abstract
public class PersonMain02{
    public static void main(String[] args) {
        //Person p = new Person();
        ChildPerson cp = new ChildPerson();
    }
}
상속이 자손 클래스를 만드는데 조상 클래스를 사용하는 것이라면, 이와 반대로 추상화는 기존의 클래스의 공통부분을 뽑아내서 조상 클래스를 만드는 것이라고 할 수 있다.
추상화를 구체화와 반대되는 의미로 이해하면 보다 쉽게 이해할 수 있을 것이다. 상속 계층도를 따라 내려갈수록 클래스는 점점 기능이 추가되어 구체화의 정도가 심해지며, 상속 계층도를 따라 올라갈수록 클래스는 추상화의 정도가 심해진다고 할 수 있다. 즉, 상속계층도를 따라 내려 갈수록 세분화되며, 올라갈수록 공통요소만 남게된다.
추상화 : 클래스간의 공통점을 찾아내서 공통의 조상을 만드는 작업
구체화 : 상속을 통해 클래스를 구현, 확장하는 작업
메소드를 부모가 쓸수도 있지만 자식이 메소드를 써놓아서 사용. 즉, 공통적인 부분을 뽑아서 추상클래스로 만들어 상속하도록 한다.
부모가 abstract를 만들어서 강제하면 자식이 받아서 구현을 하는 것(그러지 않으면 자식이 자신만의 메소드를 만들어서 사용하면 공통 메소드를 사용하는 이유가 없기 때문)
인터페이스(interface)
인터페이스는 일종의 추상클래스이다. 인터페이스는 추상클래스처럼 추상메서드를 갖지만 추상클래스보다 추상화 정도가 높아서 추상클래스와 달리 몸통을 갖춘 일반 메서드 또는 멤버변수를 구성원으로 가질 수 없다. 오직 추상메서드와 상수만을 멤버로 가질 수 있으며, 그 외의 다른 어떠한 요소도 허용하지 않는다.
class Fighter extends Unit implements Fightable {
public void move (int x, int y) { /* 내용 생략 */}
public void attack (Unit u) { /* 내용 생략 */}
}
class Unit {
int currentHP;
int x;
int y;
}
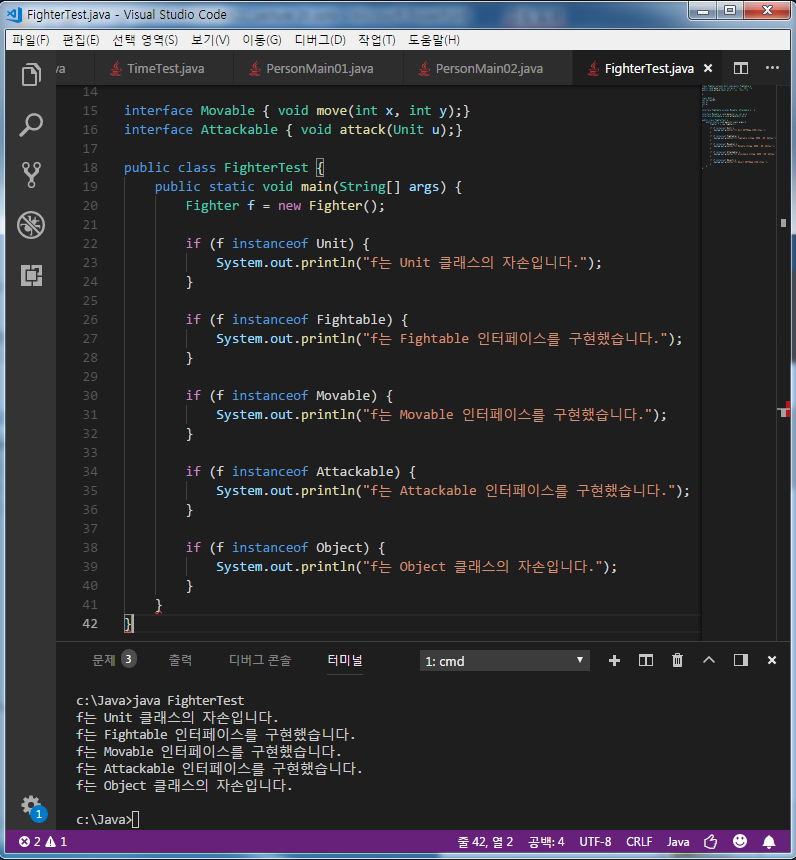
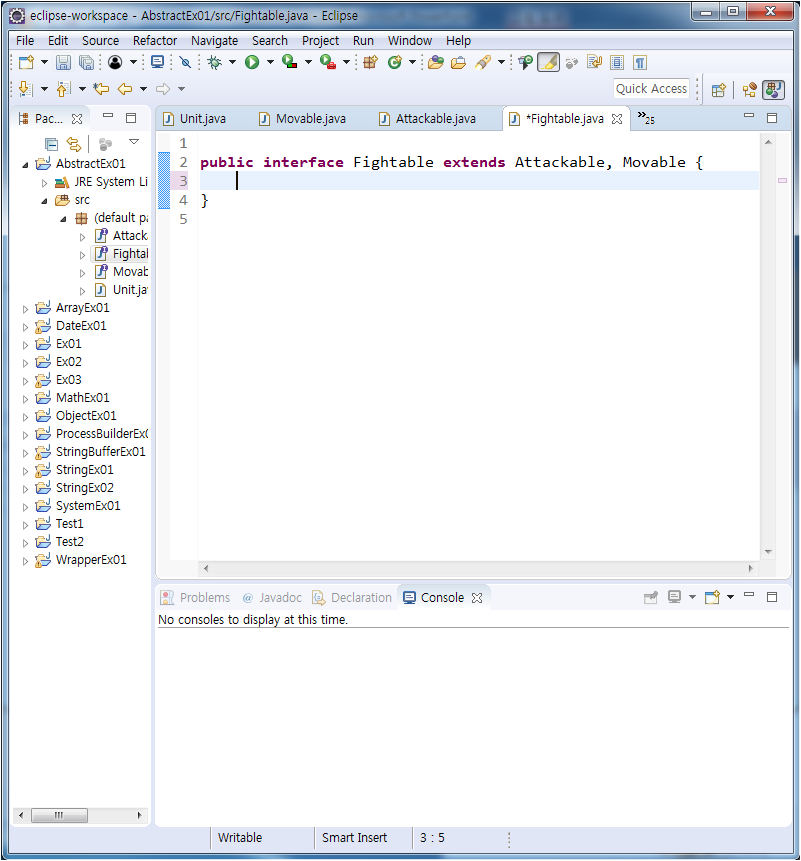
interface Fightable extends Movable, Attackable { }
interface Movable { void move(int x, int y);}
interface Attackable { void attack(Unit u);}
public class FighterTest {
public static void main(String[] args) {
Fighter f = new Fighter();
if (f instanceof Unit) {
System.out.println("f는 Unit 클래스의 자손입니다.");
}
if (f instanceof Fightable) {
System.out.println("f는 Fightable 인터페이스를 구현했습니다.");
}
if (f instanceof Movable) {
System.out.println("f는 Movable 인터페이스를 구현했습니다.");
}
if (f instanceof Attackable) {
System.out.println("f는 Attackable 인터페이스를 구현했습니다.");
}
if (f instanceof Object) {
System.out.println("f는 Object 클래스의 자손입니다.");
}
}
}
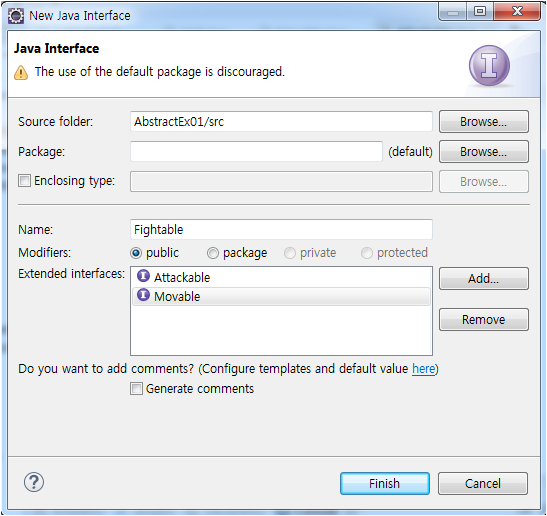
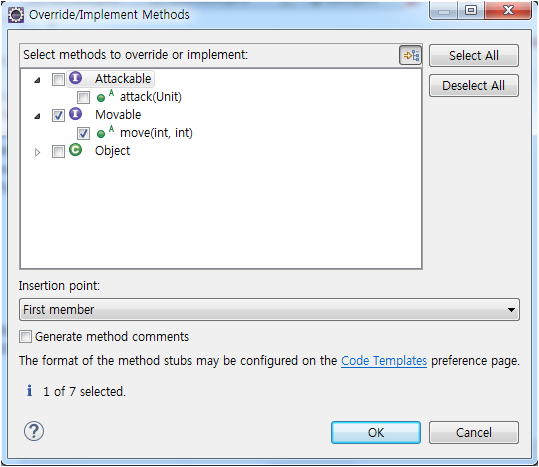
인터페이스 add 방법
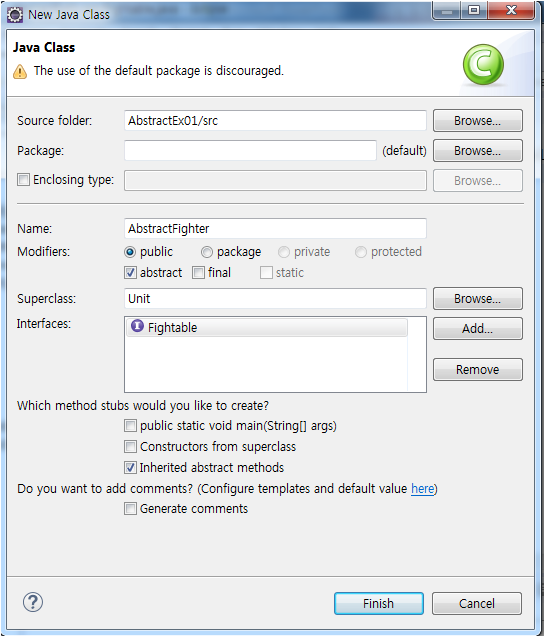
abstract 추가하는 법
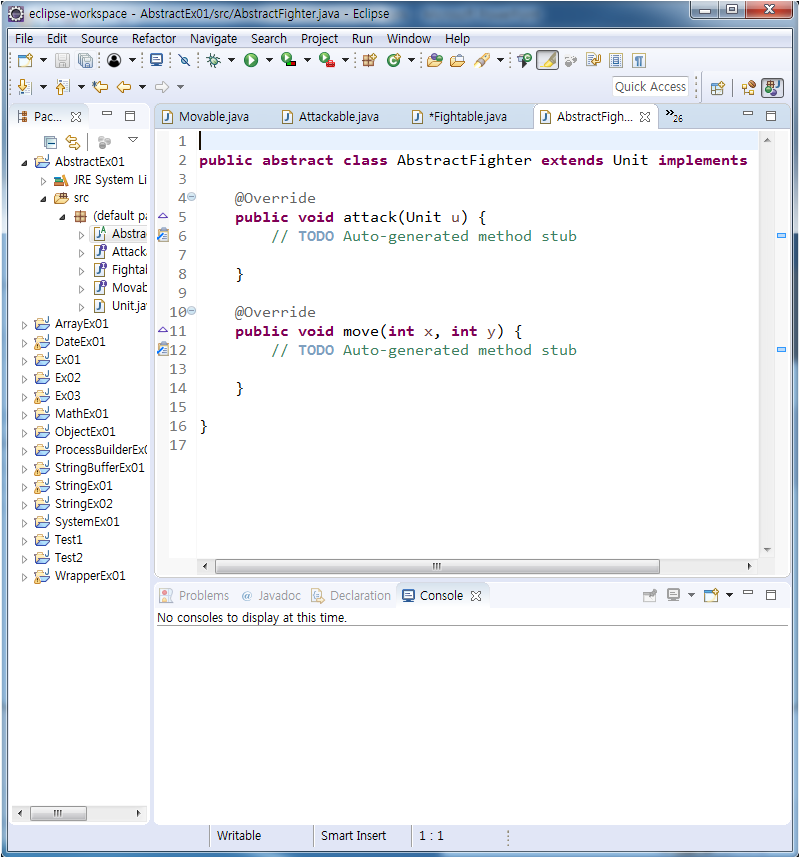

위와 같은 방법으로 implement를 눌러서 추가할 수도 있다
참조변수의 형변환
: 반드시 상속이 일어나야 한다.(부모 자식간의 형변환)
기본형 변수와 같이 참조변수도 형변환이 가능하다. 단, 서로 상속관계에 있는 클래스사이에서만 가능하기 때문에 자손타입의 참조변수를 조상타입의 참조변수로, 조상타입의 참조변수를 자손타입의 참조변수로의 형변환만 가능하다.
기본형 변수의 형변환에서 작은 자료형에서 큰 자료형의 형변환은 생략이 가능하듯이, 참조형 변수의 형변환에서는 자손타입의 참조변수를 조상타입으로 형변환하는 경우에는 형변환을 생략할 수 있다.
자손타입 -> 조상타입(up-casting) : 형변환 생략가능
자손타입 <- 조상타입(down-casting) : 형변환 생략불가
CastingEx01
public class Car {
	String color;
	int door;

	void drive() {
		System.out.println("drive, Brrrr~");
	}

	void stop() {
		System.out.println("stop!!!");
	}
}
public class FireEngine extends Car {
	void water() {
		System.out.println("water!!!");
	}
}
public class Ambulance extends Car {
	void siren() {
		System.out.println("siren~~~");
	}
}
public class CastingEx01 {

	public static void main(String[] args) {
		// TODO Auto-generated method stub
		Car car1 = new Car();
		car1.drive();

		FireEngine fe1 = new FireEngine();
		fe1.drive();
		fe1.water();
	}
}

public class CastingEx01 {

	public static void main(String[] args) {
		// TODO Auto-generated method stub
		Car car1 = new Car();
		car1.drive();

		FireEngine fe1 = new FireEngine();
		fe1.drive();
		fe1.water();

		Car car2 = fe1;
		car2.drive();
		car2.water();
	}
}
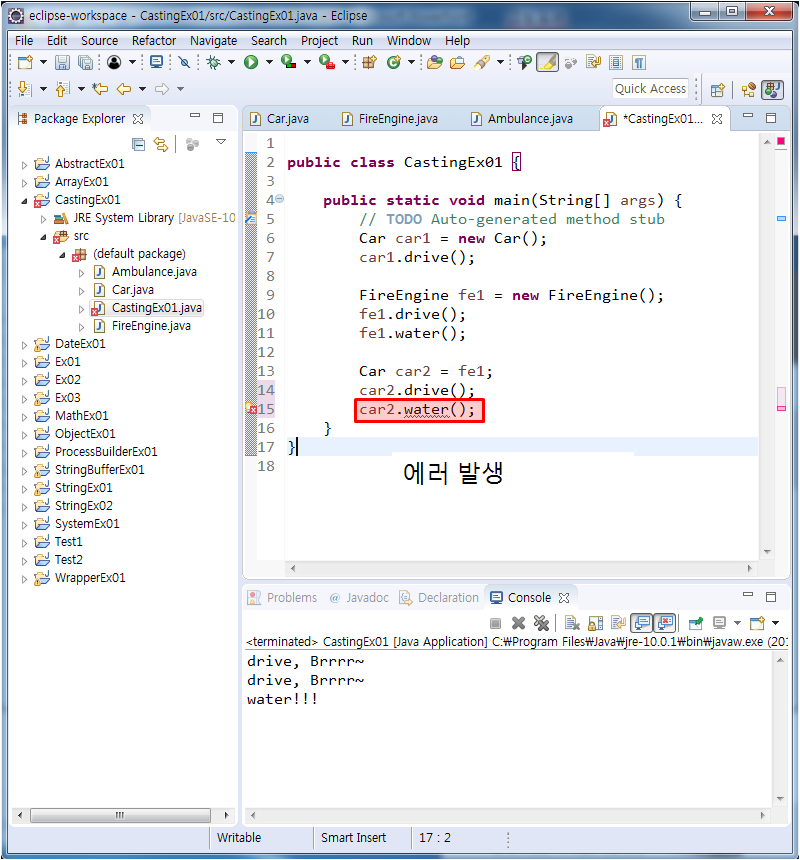
car타입의 참조변수로는 water()를 호출할 수 없다(조상 -> 자손 - 다운캐스팅)
public class CastingEx01 {

	public static void main(String[] args) {
		// TODO Auto-generated method stub
		Car car1 = new Car();
		car1.drive();

		FireEngine fe1 = new FireEngine();
		fe1.drive();
		fe1.water();

		Car car2 = fe1;
		car2.drive();
		//car2.water();

		FireEngine fe2 = (FireEngine)car2;
		fe2.drive();
		fe2.water();
	}
}
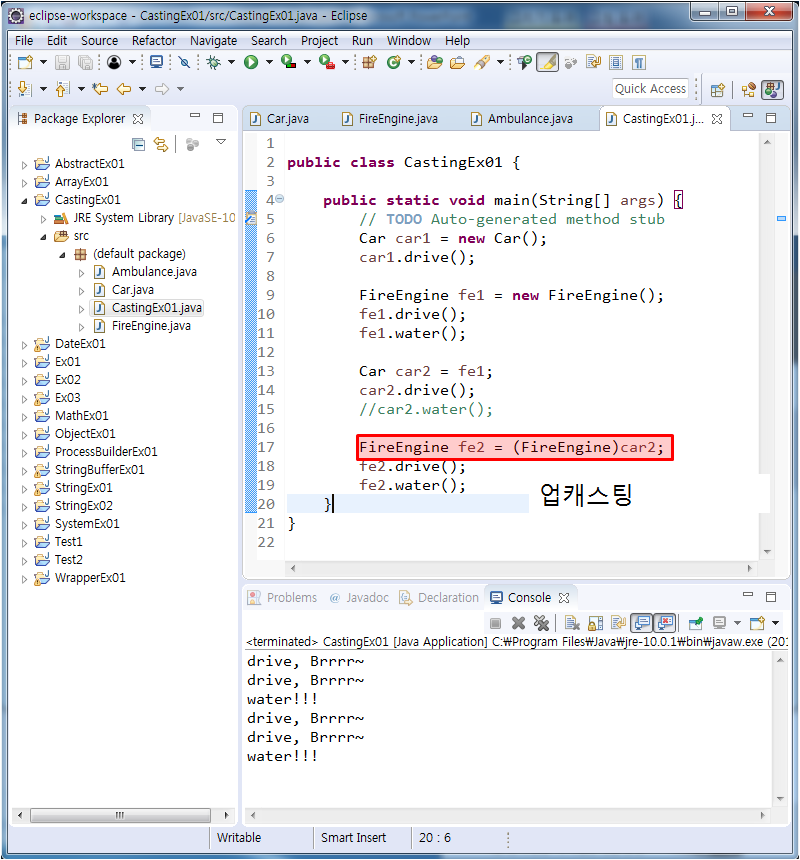
업 캐스팅으로 자손은 조상의 메소드 및 자신의 메소드 둘다 호출할 수 있다
public class CastingEx01 {

	public static void main(String[] args) {
		// TODO Auto-generated method stub
		Car car1 = new Car();
		car1.drive();

		FireEngine fe1 = new FireEngine();
		fe1.drive();
		fe1.water();

		Car car2 = fe1;
		car2.drive();
		//car2.water();

		FireEngine fe2 = (FireEngine)car2;
		fe2.drive();
		fe2.water();

		FireEngine fe3 = (FireEngine)car1;
		fe3.drive();
		fe3.water();
	}
}
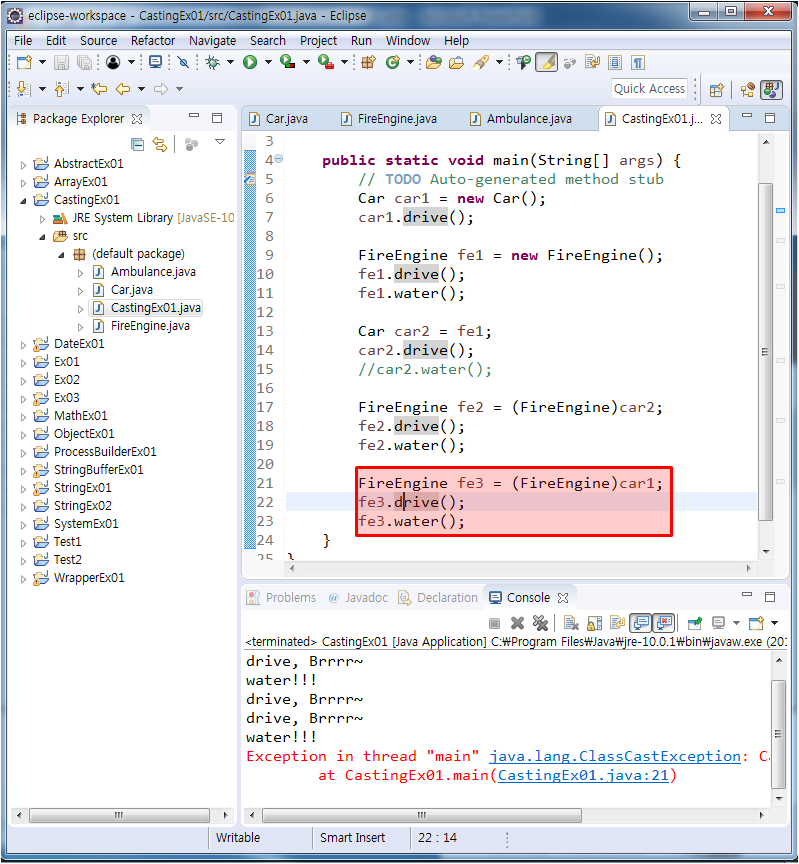
자손을 통해서 온 것만 조상으로 갈 수 있다(순서대로 되야 정상동작한다)
public class CastingEx01 {

	public static void main(String[] args) {
		// TODO Auto-generated method stub
		Car car1 = new Car();
		car1.drive();

		FireEngine fe1 = new FireEngine();
		fe1.drive();
		fe1.water();

		Car car2 = fe1;
		car2.drive();
		//car2.water();

		FireEngine fe2 = (FireEngine)car2;
		fe2.drive();
		fe2.water();

		//FireEngine fe3 = (FireEngine)car1;
		//fe3.drive();
		//fe3.water();

		Car car3 = new FireEngine();
		car3.drive();
	}
}
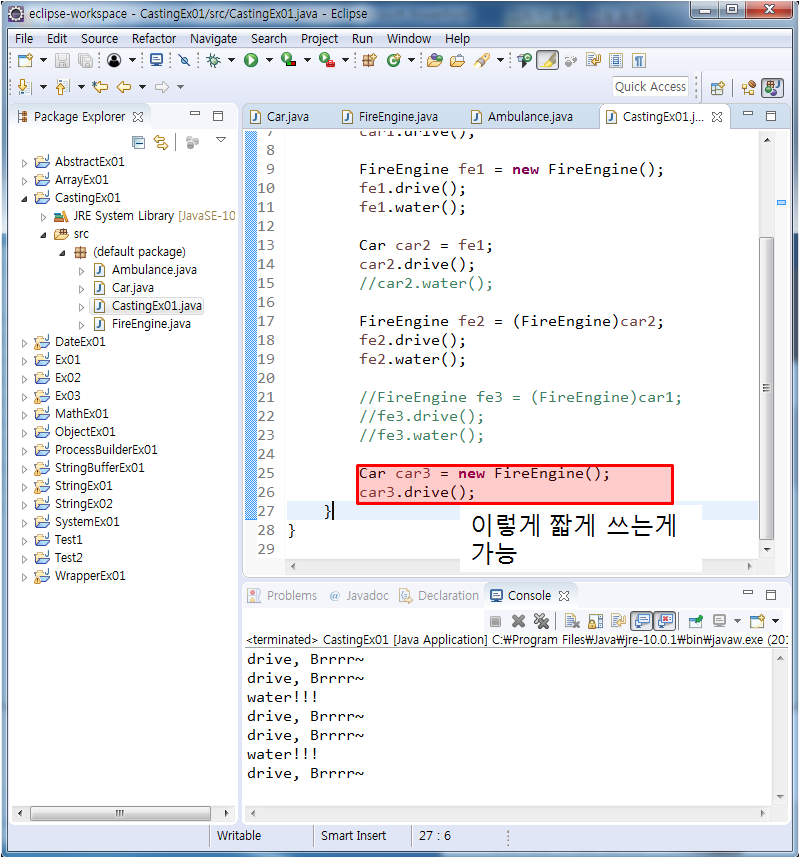
기존 개별적일때는 부모가 자식것을 불러 올 수 없었는데 , 부모의 것을 오버라이드 해서 만든 자식의 메소드를 불러올 수 있다(다운캐스팅이지만 오버라이드하면 조상이 자손의 메소드 이용 가능)
public class FireEngine extends Car {
	void water() {
		System.out.println("water!!!");
	}

	@Override
	void stop() {
		// TODO Auto-generated method stub
		System.out.println("FireEngine Stop!!!");
	}


}
public class Ambulance extends Car {
	void siren() {
		System.out.println("siren~~~");
	}

	@Override
	void stop() {
		// TODO Auto-generated method stub
		System.out.println("Ambulance Stop!!!");
	}


}
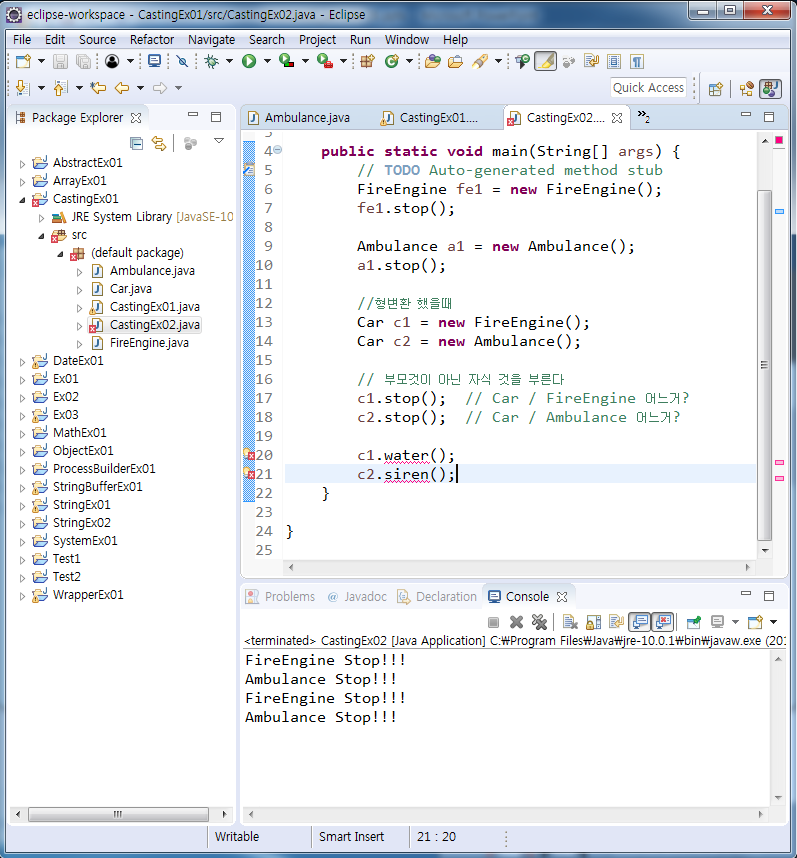
public class CastingEx02 {

	public static void main(String[] args) {
		// TODO Auto-generated method stub
		FireEngine fe1 = new FireEngine();
		fe1.stop();

		Ambulance a1 = new Ambulance();
		a1.stop();

		//형변환 했을때
		Car c1 = new FireEngine();
		Car c2 = new Ambulance();

		// 부모것이 아닌 자식 것을 부른다
		c1.stop();	// Car / FireEngine 어느거?
		c2.stop();	// Car / Ambulance 어느거?
	}

}
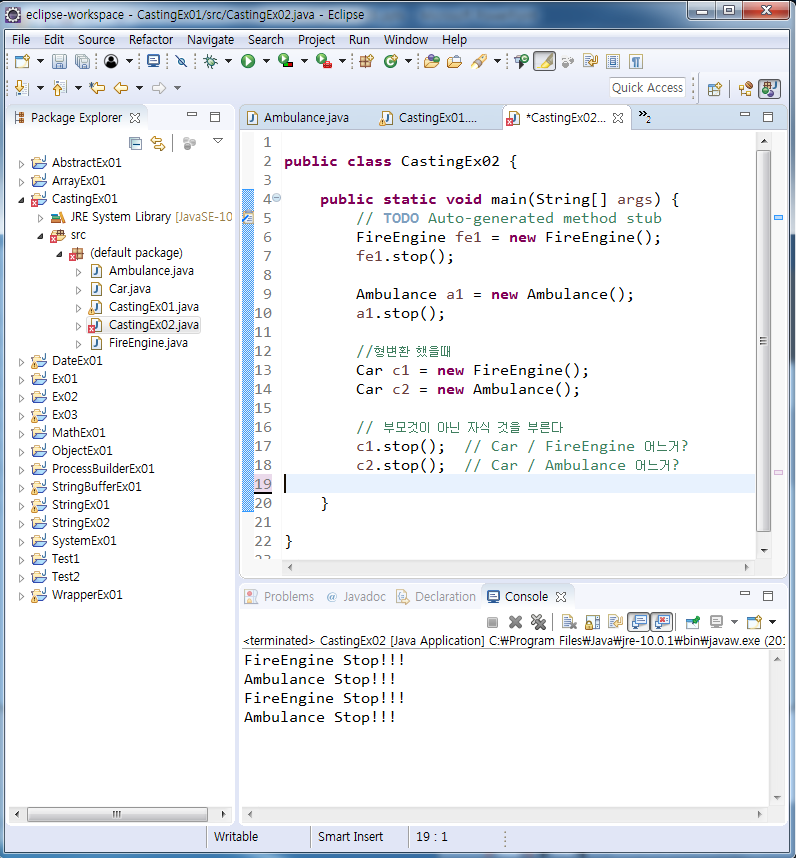
조상이 자손을 다운캐스팅할때 오버라이드를 통해 하면 조상의 메소드를 불러올 수 있다
그러나 오버라이드를 통했을 때 자손은 자신의 메소드를 불러 올 수 없다
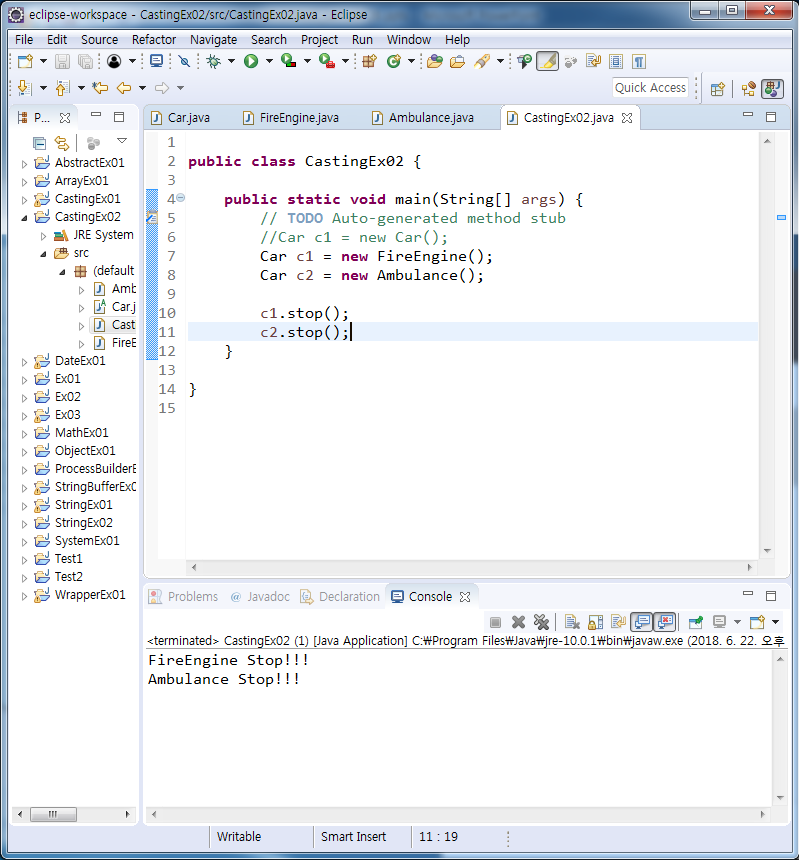
CastingEx02 - 추상클래스를 사용하는 방법
public abstract class Car {
	void drive() {
		System.out.println("drive, Brrrr~");
	}

	public abstract void stop();
}
public class FireEngine extends Car {
@Override
public void stop() {
// TODO Auto-generated method stub
System.out.println("FireEngine Stop!!!");
}
}
public class Ambulance extends Car {

	@Override
	public void stop() {
		// TODO Auto-generated method stub
		System.out.println("Ambulance Stop!!!");
	}

}
public class CastingEx02 {

	public static void main(String[] args) {
		// TODO Auto-generated method stub
		//Car c1 = new Car();
		Car c1 = new FireEngine();
		Car c2 = new Ambulance();

		c1.stop();
		c2.stop();
	}

}
다형성(polymorphism)
다형성이란 '여러 가지 형태를 가질 수 있는 능력'을 의미하며, 자바에서는 한 타입의 참조변수로 여러 타입의 객체를 참조할 수 있도록 함으로써 다형성을 프로그램적으로 구현하였다.
조상클래스 타입의 참조변수로 자손클래스의 인스턴스를 참조할 수 있도록 하였다는 것이다.
조상타입의 참조변수로 자손타입의 인스턴스를 참조할 수 있다.
반대로 자손타입의 참조변수로 조상타입의 인스턴스를 참조할 수는 없다.
인터페이스를 이용한 다형성
ParserTest
Fightable f = (Fightable) new Fighter();
또는
Fightable f = new Fighter();
public class XMLParser implements Parseable {
@Override
public void parse(String fileName) {
// TODO Auto-generated method stub
System.out.println(fileName + "- XML parsing completed.");
}
}
public class HTMLParser implements Parseable {

	@Override
	public void parse(String fileName) {
		// TODO Auto-generated method stub
		System.out.println(fileName + "- HTML parsing completed");
	}

}
public class ParserManager {
	public static Parseable getParser(String type) {
		if(type.equals("XML")) {
			return new XMLParser();
		} else {
			Parseable p = new HTMLParser();
			return p;
		}
	}
}
public class ParserTest {

	public static void main(String[] args) {
		// TODO Auto-generated method stub
		Parseable parser = ParserManager.getParser("XML");
		parser.parse("document.xml");
		parser = ParserManager.getParser("HTML");
		parser.parse("document2.html");
	}

}
인터페이스의 장점
- 개발시간을 단축시킬 수 있다
- 표준화가 가능하다
- 서로 관게없는 클래스들에게 관계를 맺어 줄 수 있다
- 독립적인 프로그래밍 가능하다
내부 클래스(inner class)
내부 클래스는 클래스 내에 선언된 클래스이다.
내부 클래스의 장점
- 내부 클래스에서 외부 클래스의 멤버들을 쉽게 접근할 수 있다
- 코드의 복잡성을 줄일 수 있다(캡슐화)
내부 클래스의 종류와 특징(익명을 빼고는 멤버메소드랑 똑같은 형태이다)
1. 인스턴스 클래스 : 외부 클래스의 멤버변수 선언위치에 선언, 외부 클래스의 인스턴스 멤버처럼 다룬다. 주로 외부 클래스의 인스턴스 멤버들과 관련된 작업에 사용될 목적으로 선언
2. 스태틱 클래스 : 외부 클래스의 멤버변수 선언위치에 선언, 외부 클래스의 static멤버처럼 다룬다. 주로 외부 클래스의 static멤버, 특히 static 메서드에서 사용될 목적으로 선언
3. 지역 클래스 : 메서드 안이나 초기화 블럭 안에서 사용
4. 익명 클래스 : 이름이 없는 클래스
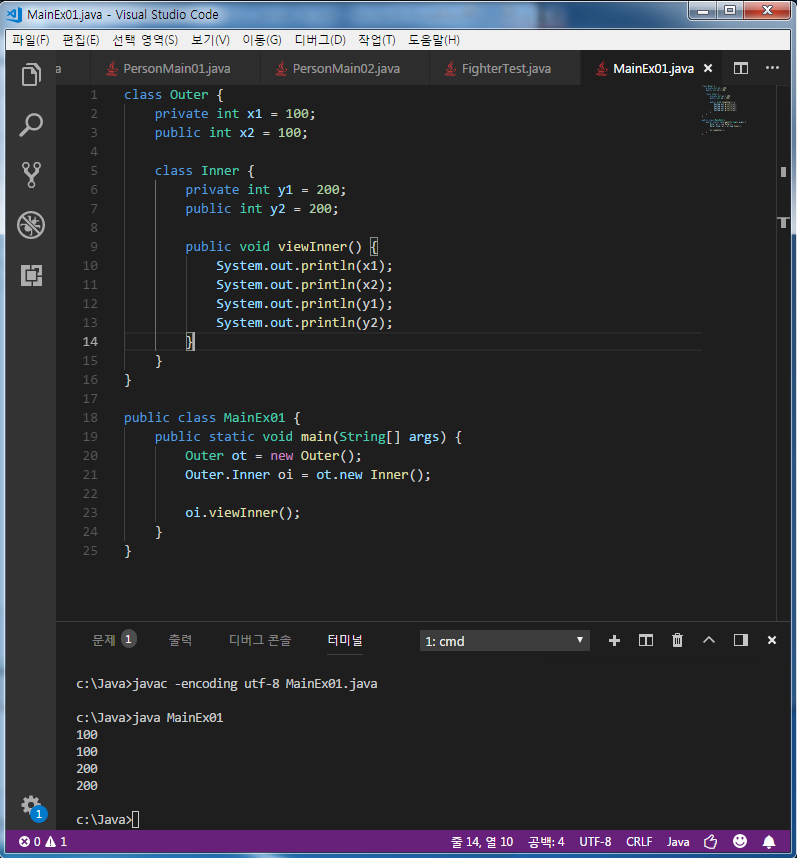
MainEx01 - Instance inner class
class Outer {
    private int x1 = 100;
    public int x2 = 100;

    class Inner {
        private int y1 = 200;
        public int y2 = 200;

        public void viewInner() {
            System.out.println(x1);
            System.out.println(x2);
            System.out.println(y1);
            System.out.println(y2);
        }
    }
}

public class MainEx01 {
    public static void main(String[] args) {
        Outer ot = new Outer();
        Outer.Inner oi = ot.new Inner();

        oi.viewInner();
    }
}
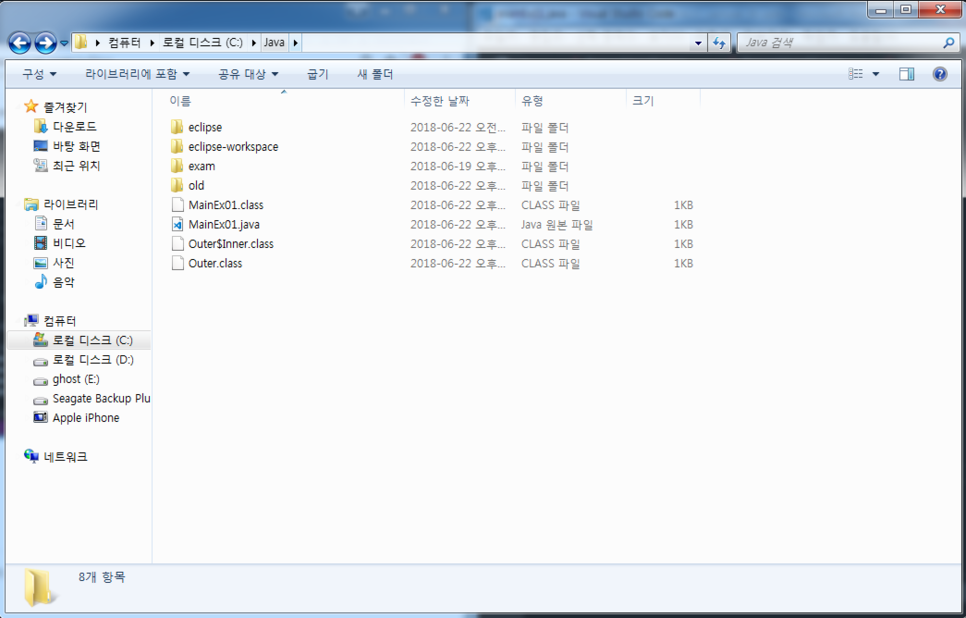
클래스가 main, outer, inner인데 outer$inner라는 메서드 안에 있는 클래스가 생긴다. ($는 메서드 안에 클래스가 있다는 뜻이다)
inner로 불러오면 getter, setter를 안써도 inner가 같은 클래스 안에 있고 이런 inner를 불러오기 때문에 getter, setter는 필요 없다.
MainEx02 - Static Inner class
// static inner
class Outer {
    private int x1 = 100;
    public int x2 = 100;

    static class Inner {
        private int y1 = 200;
        public int y2 = 200;

        public void viewInner() {
            //System.out.println(x1);
            //System.out.println(x2);
            System.out.println(y1);
            System.out.println(y2);
        }
    }
}

public class MainEx02 {
    public static void main(String[] args) {
        Outer.Inner oi = new Outer.Inner();

        oi.viewInner();
    }
}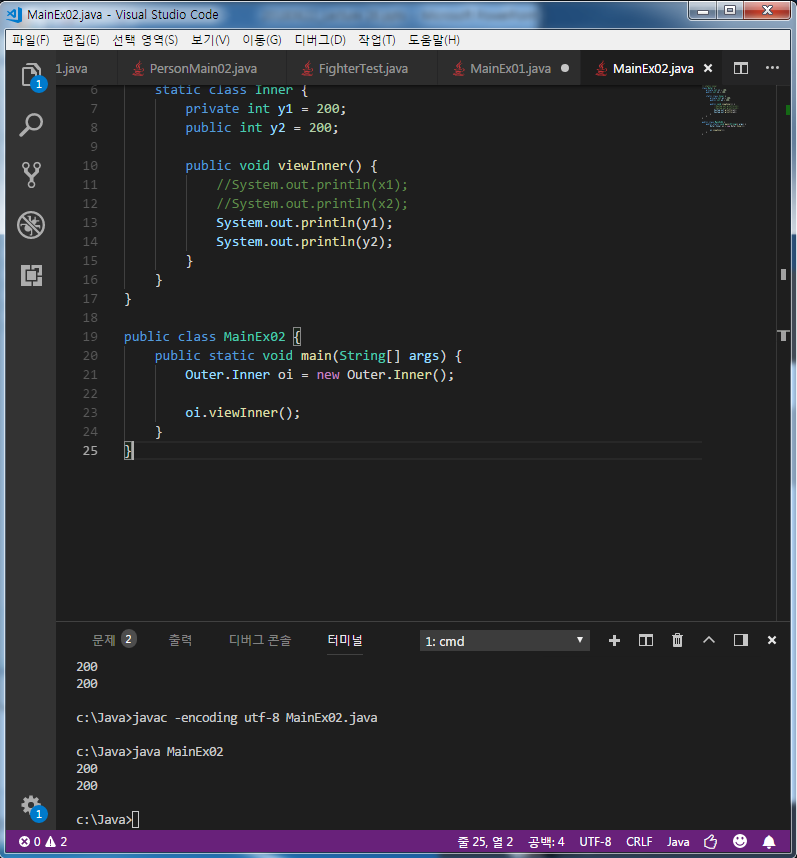
static을 써주면 static안에 있는 인스턴스만 접근가능함
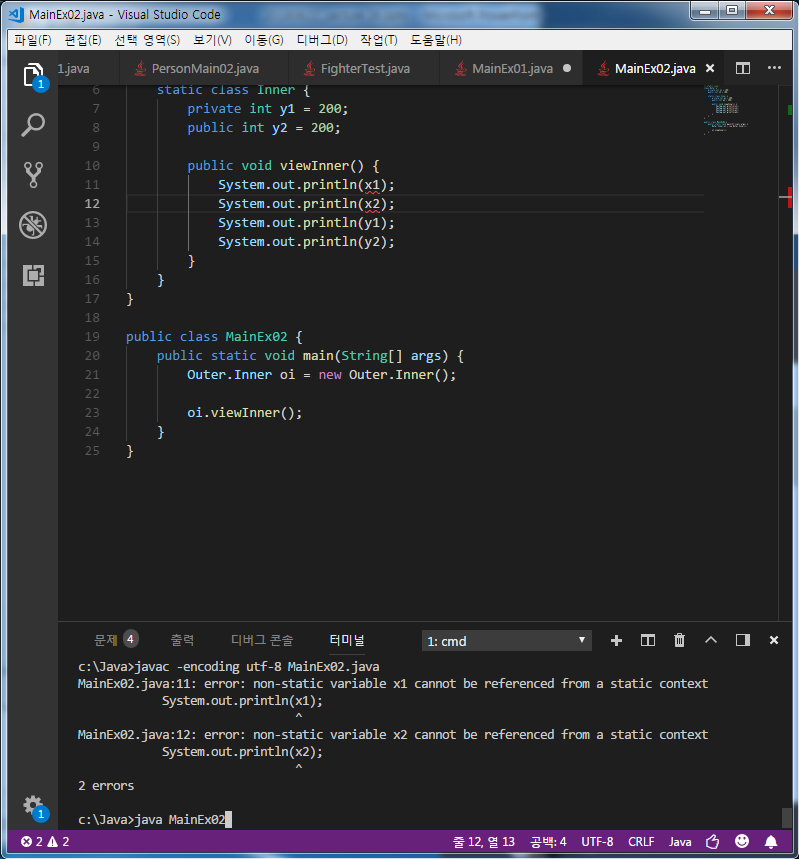
x1, x2는 Outer 클래스라서 접근 안됨 - 에러 발생!!
MainEx03 - 지역 클래스(local class)
public class MainEx03 {
    public static void main(String[] args) {
        // 선언
        class Inner {
            int y = 200;

            public void viewInner() {
                System.out.println(y);
            }
        }

        // 실행
        Inner i = new Inner();
        i.viewInner();
    }
}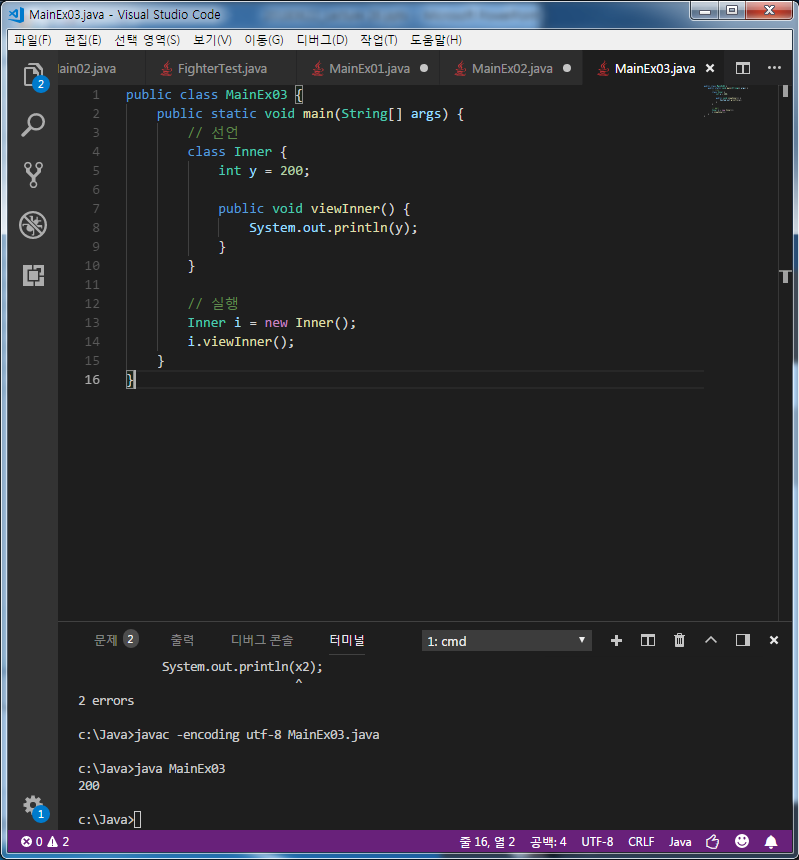
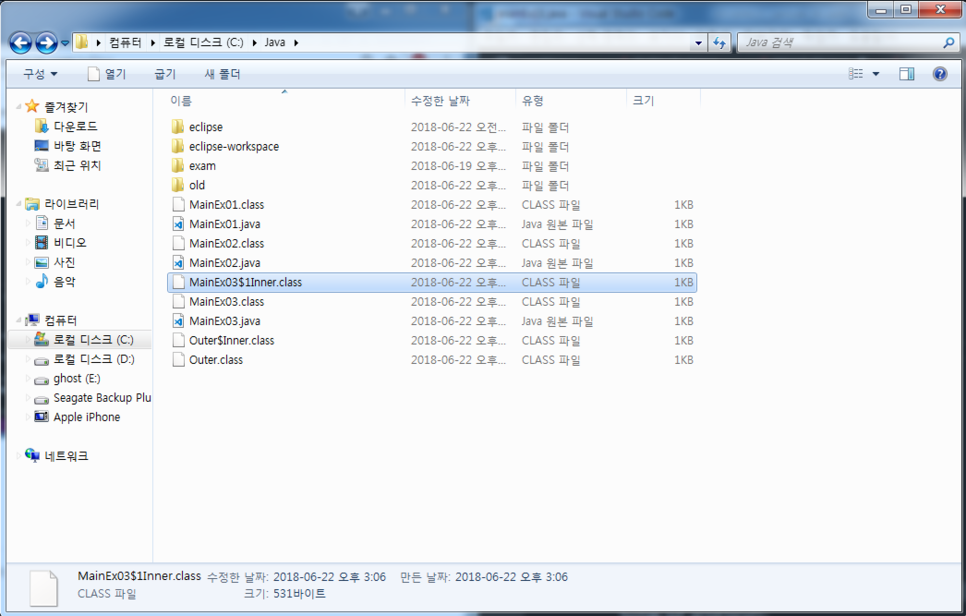
$가 있으면 메서드 안에 있는 클래스라는 뜻
MainEx04 - 익명 Inner class
// 익명 Inner class
// 인터페이스 선언과 즉시 메서드처럼 사용하고 싶을때 사용

interface Inner {
    public abstract void viewInner();
}

public class MainEx04 {
    public static void main(String[] args) {
        // 인터페이스를 직접적으로 객체변수화
        Inner i = new Inner() {
            public void viewInner() {
                System.out.println("viewInner() 호출");
            }
        };

        i.viewInner();
    }
}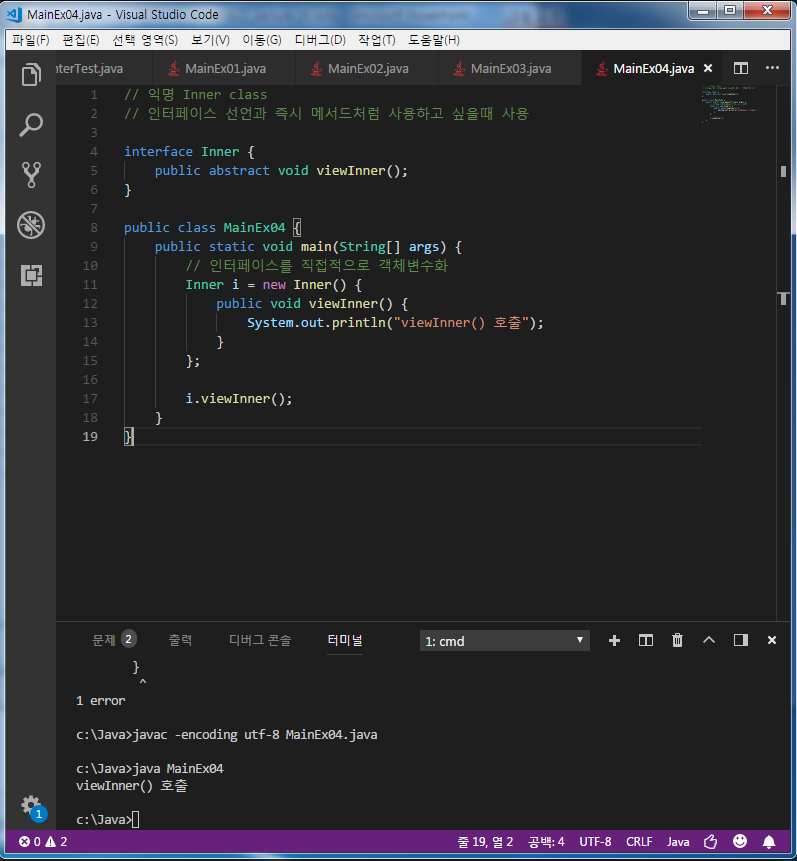
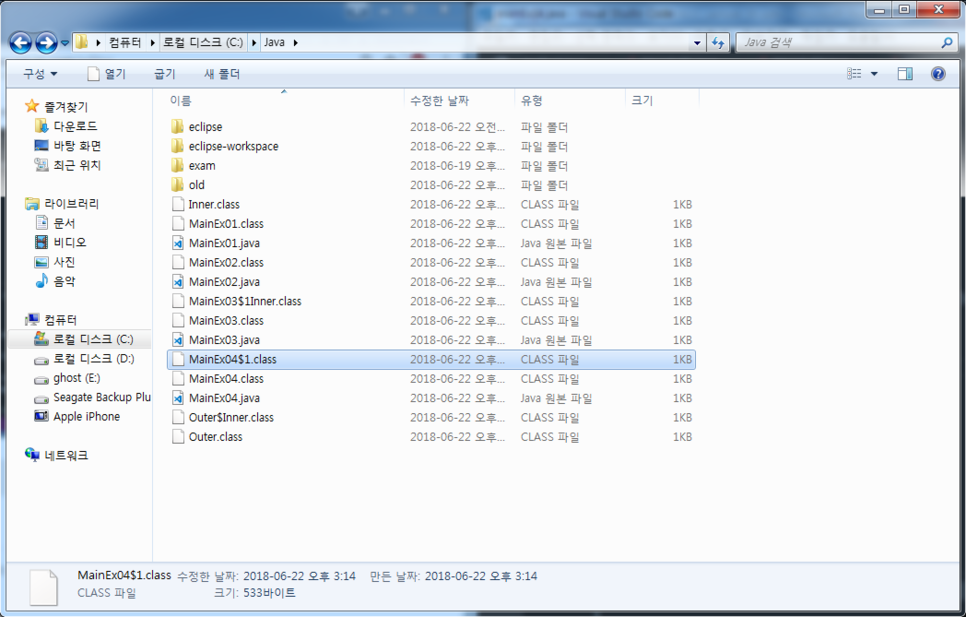
클래스 이름이 없다
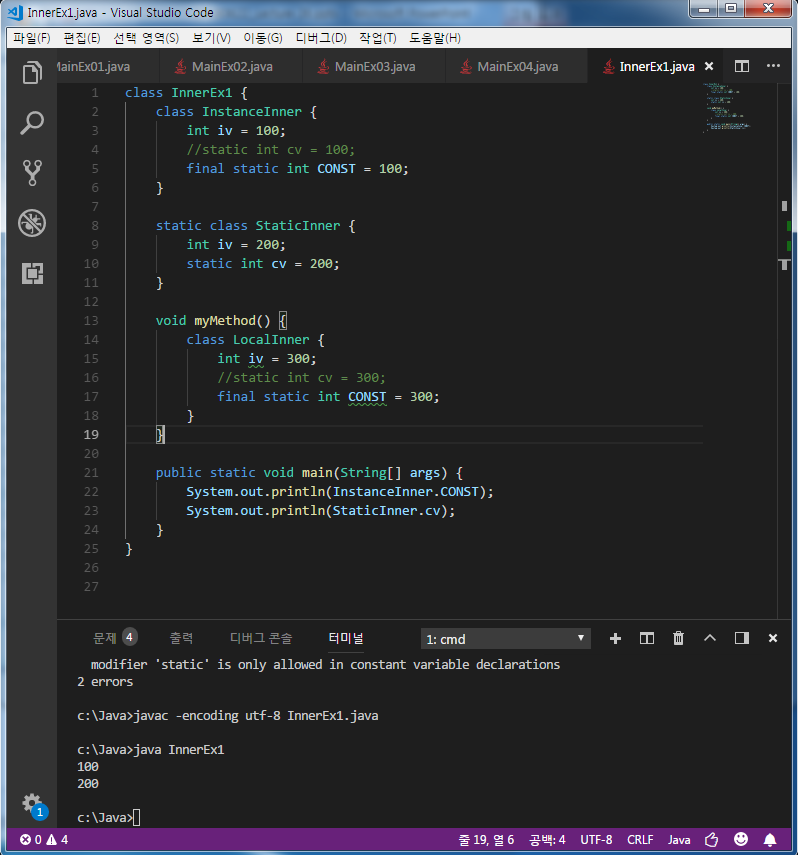
InnerEx1
class InnerEx1 {
    class InstanceInner {
        int iv = 100;
        //static int cv = 100;
        final static int CONST = 100;
    }

    static class StaticInner {
        int iv = 200;
        static int cv = 200;
    }

    void myMethod() {
        class LocalInner {
            int iv = 300;
            //static int cv = 300;
            final static int CONST = 300;
        }
    }

    public static void main(String[] args) {
        System.out.println(InstanceInner.CONST);
        System.out.println(StaticInner.cv);
    }
}
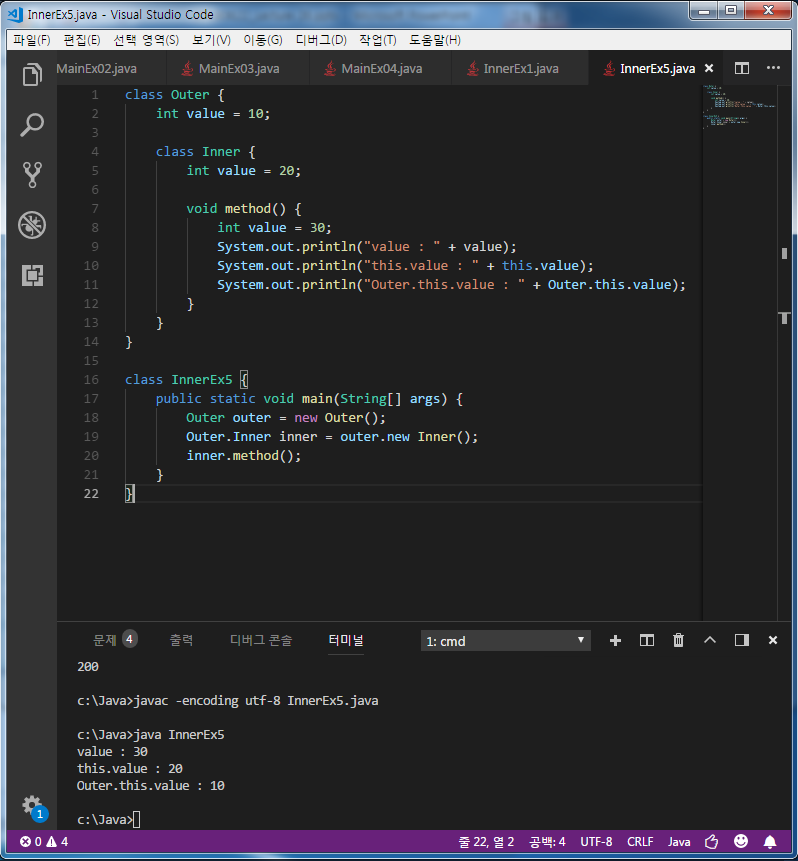
InnerEx5
class Outer {
    int value = 10;

    class Inner {
        int value = 20;

        void method() {
            int value = 30;
            System.out.println("value : " + value);
            System.out.println("this.value : " + this.value);
            System.out.println("Outer.this.value : " + Outer.this.value);
        }
    }
}

class InnerEx5 {
    public static void main(String[] args) {
        Outer outer = new Outer();
        Outer.Inner inner = outer.new Inner();
        inner.method();
    }
}
예외처리(exception handling)
고급지게 에러를 핸들링 하는 방법
- 컴파일 에러 : 컴파일 시에 발생하는 에러
- 런타임 에러 : 실행 시에 발생하는 에러
- 논리적 에러 : 실행은 되지만, 의도와 다르게 동작하는 것(버그에 가깝다)
예외 클래스의 계층구조
Runtime Exception
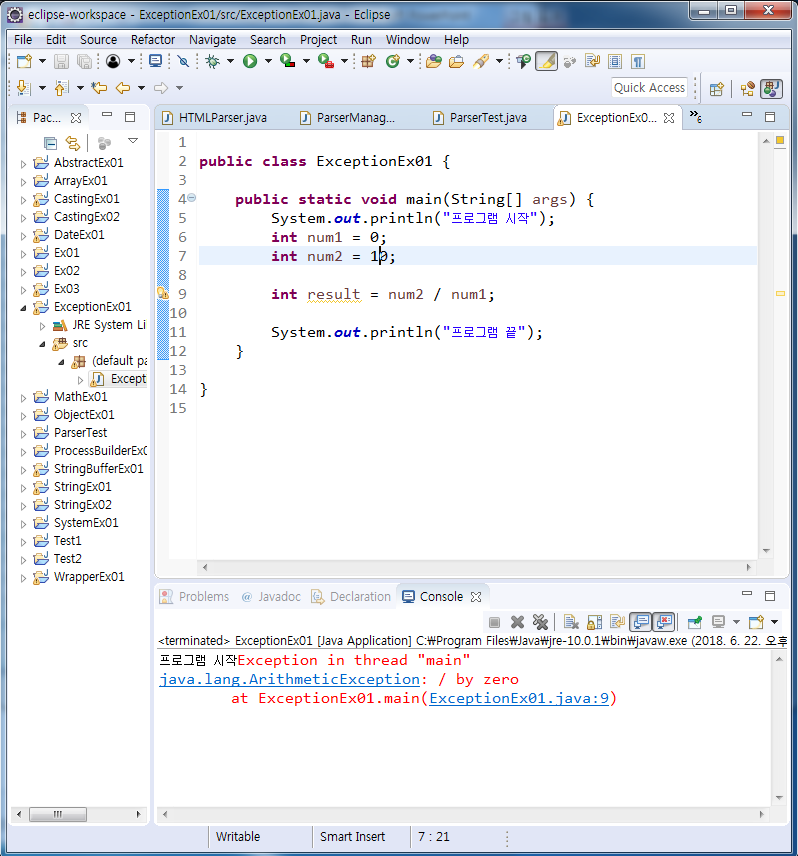
public class ExceptionEx01 {

	public static void main(String[] args) {
		System.out.println("프로그램 시작");
		int num1 = 0;
		int num2 = 10;

		if(num1 != 0) {
		int result = num2 / num1;
		} else {
			System.out.println("0으로 나눌수 없습니다");
		}
		System.out.println("프로그램 끝");
	}

}
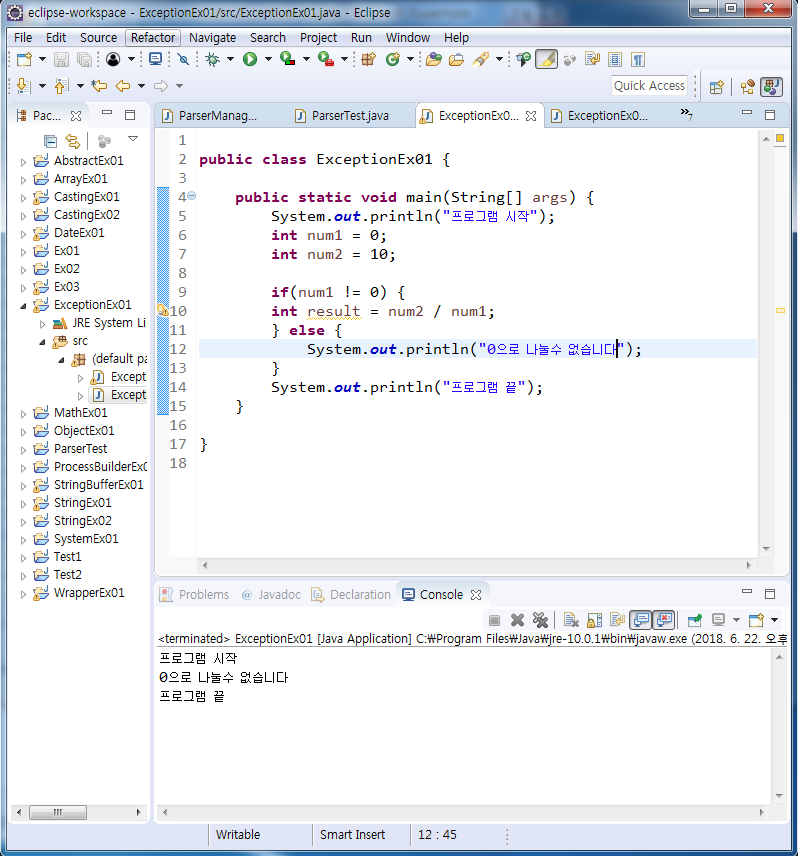
위와 같이 예외를 처리한다
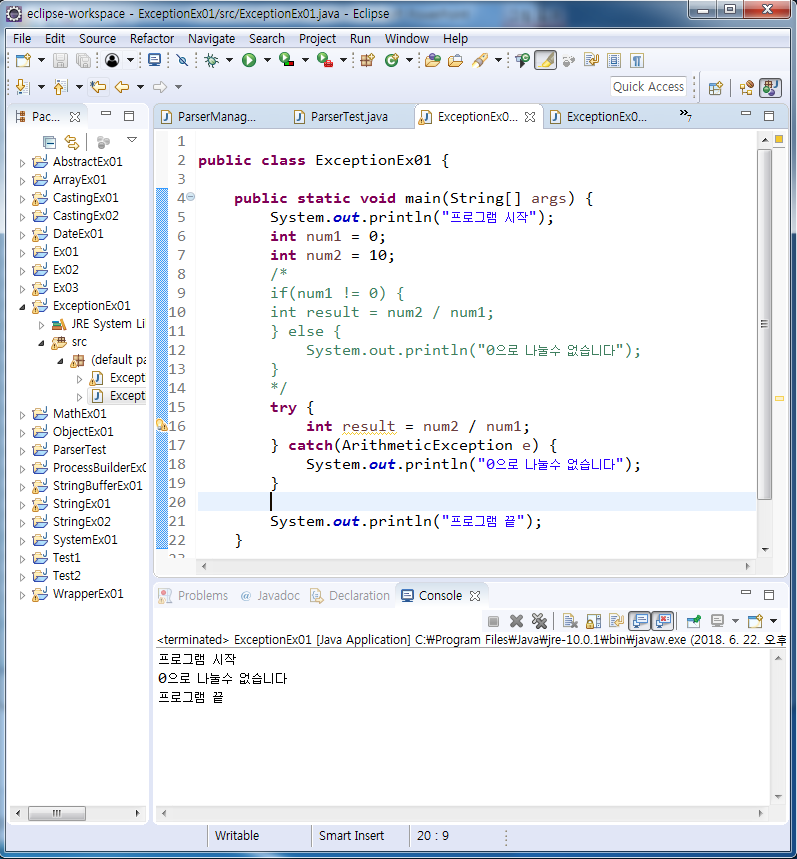
예외처리하기 - try-catch문
public class ExceptionEx01 {

	public static void main(String[] args) {
		System.out.println("프로그램 시작");
		int num1 = 0;
		int num2 = 10;
		/*
		if(num1 != 0) {
		int result = num2 / num1;
		} else {
			System.out.println("0으로 나눌수 없습니다");
		}
		*/
		try {
			int result = num2 / num1;
		} catch(ArithmeticException e) {
			System.out.println("0으로 나눌수 없습니다");
		}

		System.out.println("프로그램 끝");
	}

}
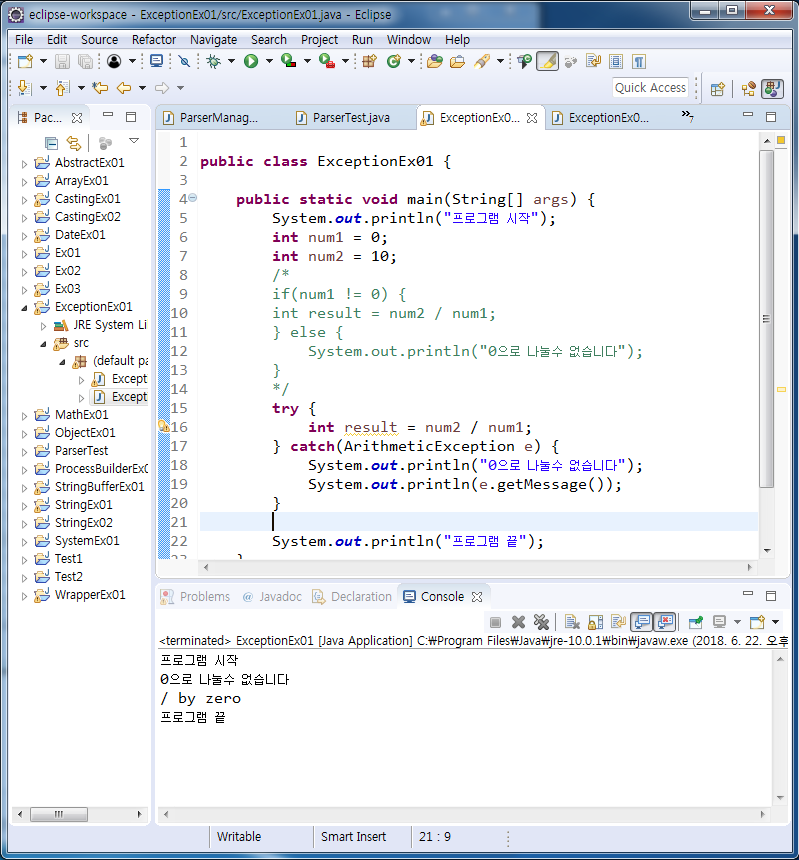
public class ExceptionEx01 {

	public static void main(String[] args) {
		System.out.println("프로그램 시작");
		int num1 = 0;
		int num2 = 10;
		/*
		if(num1 != 0) {
		int result = num2 / num1;
		} else {
			System.out.println("0으로 나눌수 없습니다");
		}
		*/
		try {
			int result = num2 / num1;
		} catch(ArithmeticException e) {
			System.out.println("0으로 나눌수 없습니다");
			System.out.println(e.getMessage());
		}

		System.out.println("프로그램 끝");
	}

}
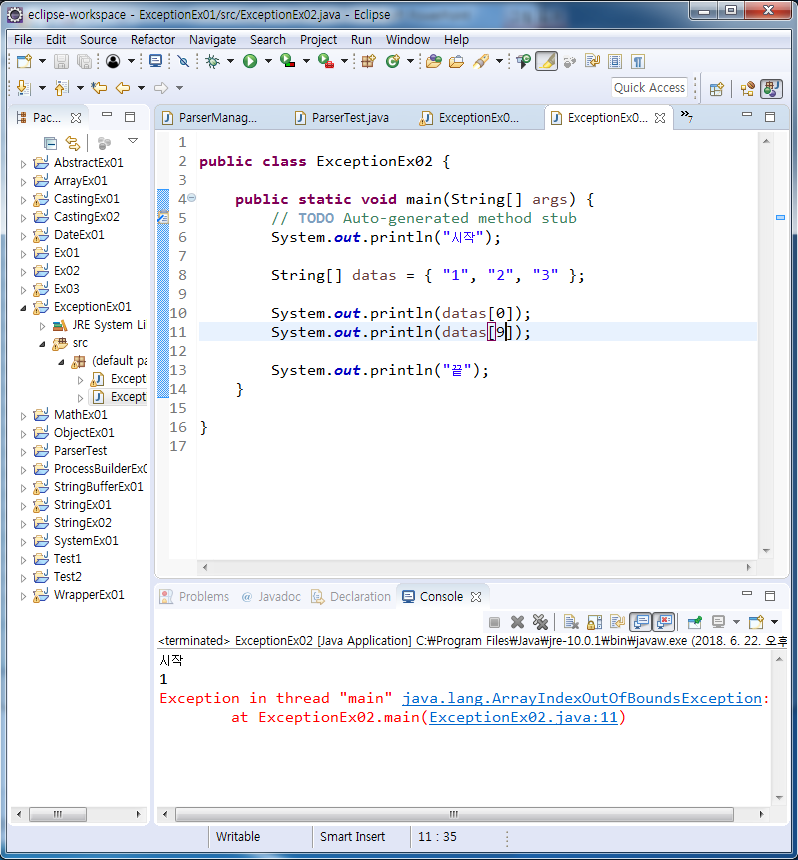
또다른 runtime exception
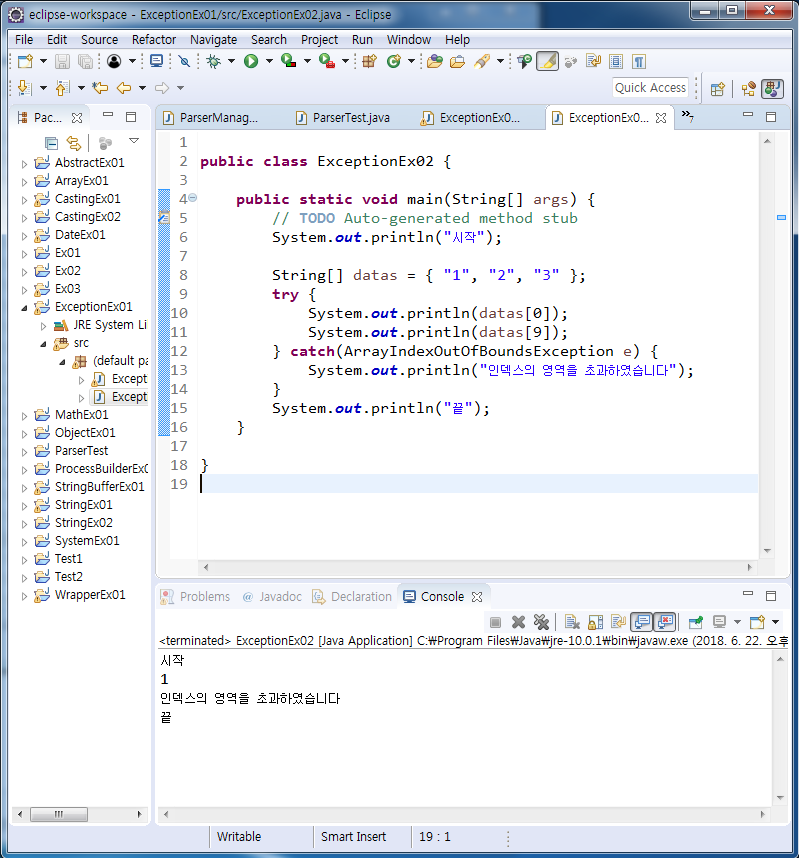
public class ExceptionEx02 {

	public static void main(String[] args) {
		// TODO Auto-generated method stub
		System.out.println("시작");

		String[] datas = { "1", "2", "3" };
		try {
			System.out.println(datas[0]);
			System.out.println(datas[9]);
		} catch(ArrayIndexOutOfBoundsException e) {
			System.out.println("인덱스의 영역을 초과하였습니다");
		}
		System.out.println("끝");
	}

}
public class ExceptionEx03 {

	public static void main(String[] args) {
		// TODO Auto-generated method stub
		try {
			int num1 = 0;
			int num2 = 10;
			String[] datas = { "1", "2", "3" };

			int result = num2 / num1;

			System.out.println(datas[0]);
			System.out.println(datas[9]);
		//} catch(ArithmeticException e) {

		//} catch(ArrayIndexOutOfBoundsException e) {
		} catch(Exception e) {

		}
	}
}
public class ExceptionEx03 {

	public static void main(String[] args) {
		// TODO Auto-generated method stub
		try {
			int num1 = 0;
			int num2 = 10;
			String[] datas = { "1", "2", "3" };

			int result = num2 / num1;

			System.out.println(datas[0]);
			System.out.println(datas[9]);
		} catch(ArithmeticException e) {

		//} catch(ArrayIndexOutOfBoundsException e) {
		} catch(Exception e) {

		}
	}
}
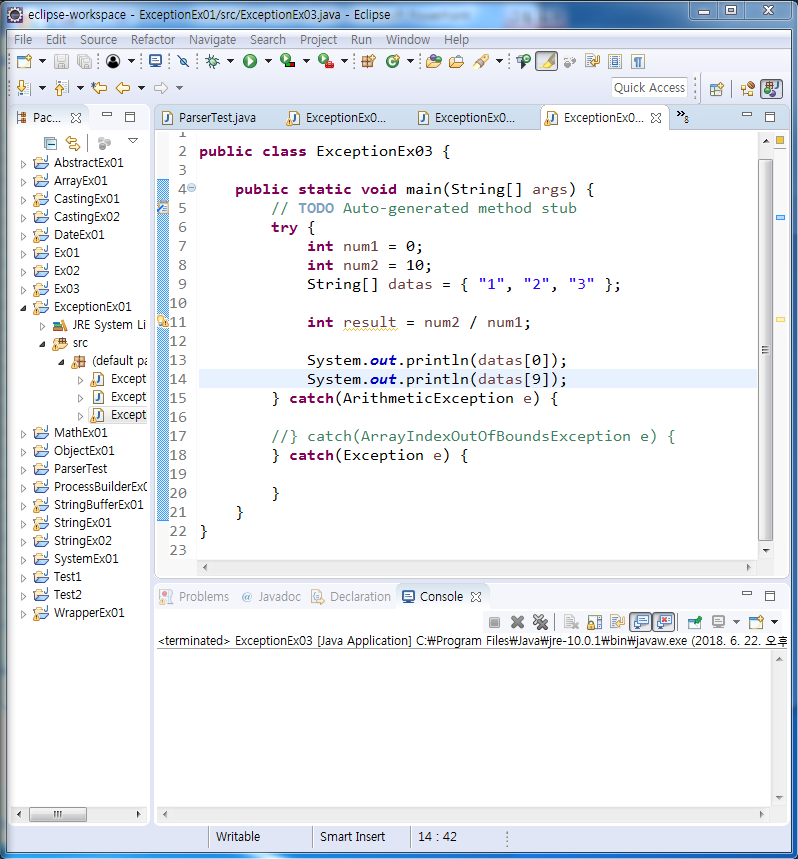
ArithmeticException을 먼저 하고 나머지 Exception
public class ExceptionEx03 {

	public static void main(String[] args) {
		// TODO Auto-generated method stub
		try {
			int num1 = 0;
			int num2 = 10;
			String[] datas = { "1", "2", "3" };

			int result = num2 / num1;

			System.out.println(datas[0]);
			System.out.println(datas[9]);
		} catch(Exception e) {

		}
		} catch(ArithmeticException e) {
		//} catch(ArrayIndexOutOfBoundsException e) {
		//} catch(Exception e) {
		}
	}
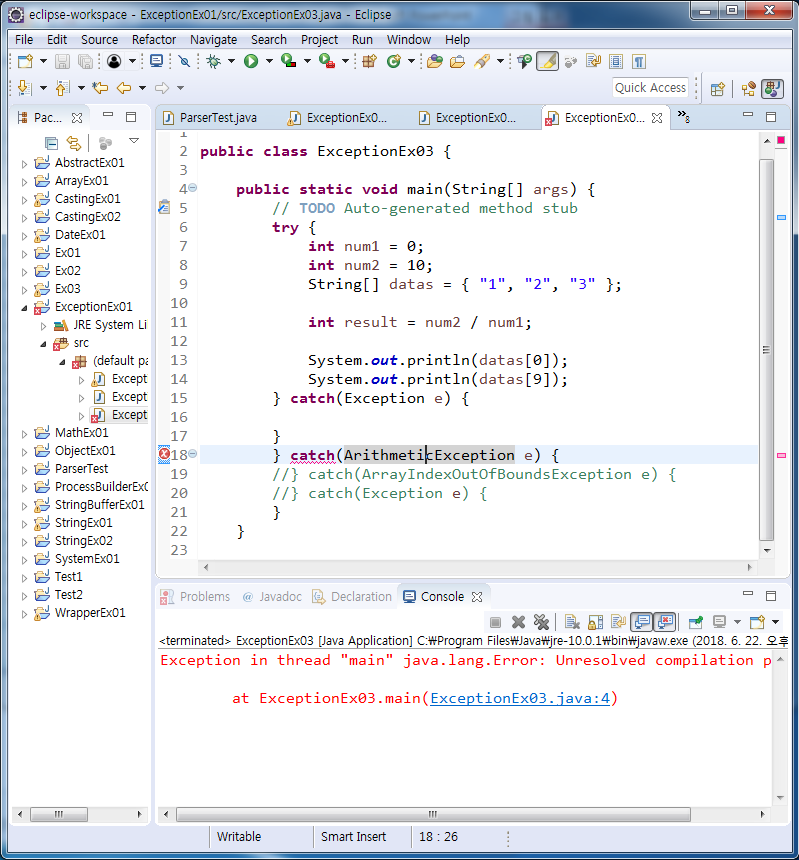
exception을 먼저 써줄 경우 에러남
멀티 catch블럭
여러 catch 블럭을 '|' 기호를 이용해서, 하나의 catch블럭으로 합칠 수 있다
finally 블럭
try-catch문과 함께 예외의 발생여부에 상관없이 실행되어야할 코드를 포함시킬 목적으로 사용한다. try-catch문의 끝에 선택적으로 덧붙여 사용할 수 있으며, try-catch-finally의 순서로 구성된다.
즉, Exception이 나든 안나든 무조건 실행
public class ExceptionEx04 {

	public static void main(String[] args) {
		System.out.println("프로그램 시작");
		int num1 = 0;
		int num2 = 10;

		try {
			System.out.println("1");
			int result = num2 / num1;
			System.out.println("2");
		} catch(ArithmeticException e) {
			System.out.println(e.getMessage());
		} finally {
			System.out.println("3");
		}

		System.out.println("프로그램 끝");
	}

}
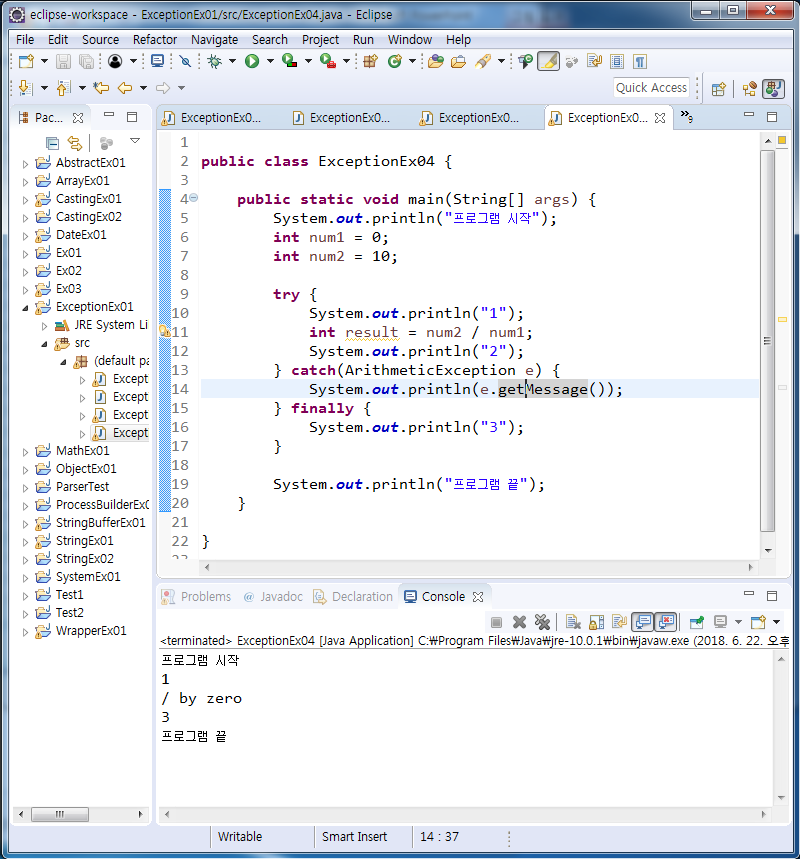
Exception이 있을 때
public class ExceptionEx04 {

	public static void main(String[] args) {
		System.out.println("프로그램 시작");
		int num1 = 1;
		int num2 = 10;

		try {
			System.out.println("1");
			int result = num2 / num1;
			System.out.println("2");
		} catch(ArithmeticException e) {
			System.out.println(e.getMessage());
		} finally {
			System.out.println("3");
		}

		System.out.println("프로그램 끝");
	}

}
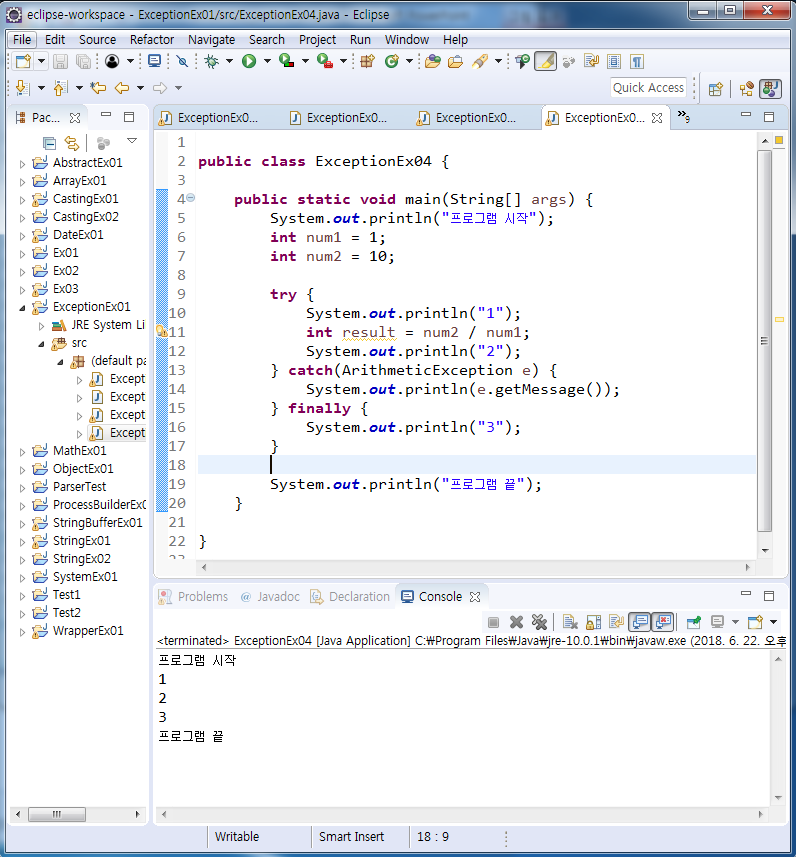
Exception이 없을 때
FinallyTest3
public class FinallyTest3 {

	public static void main(String[] args) {
		// TODO Auto-generated method stub
		FinallyTest3.method1();
		System.out.println("method1()의 수행을 마치고 main메서드로 돌아왔습니다.");
	}

	static void method1() {
		try {
			System.out.println("meethod1()이 호출되었습니다.");
			return;
		} catch (Exception e) {
			e.printStackTrace();
		} finally {
			System.out.println("meethod1()의 finally 블럭이 실행되었습니다.");
		}
	}
}
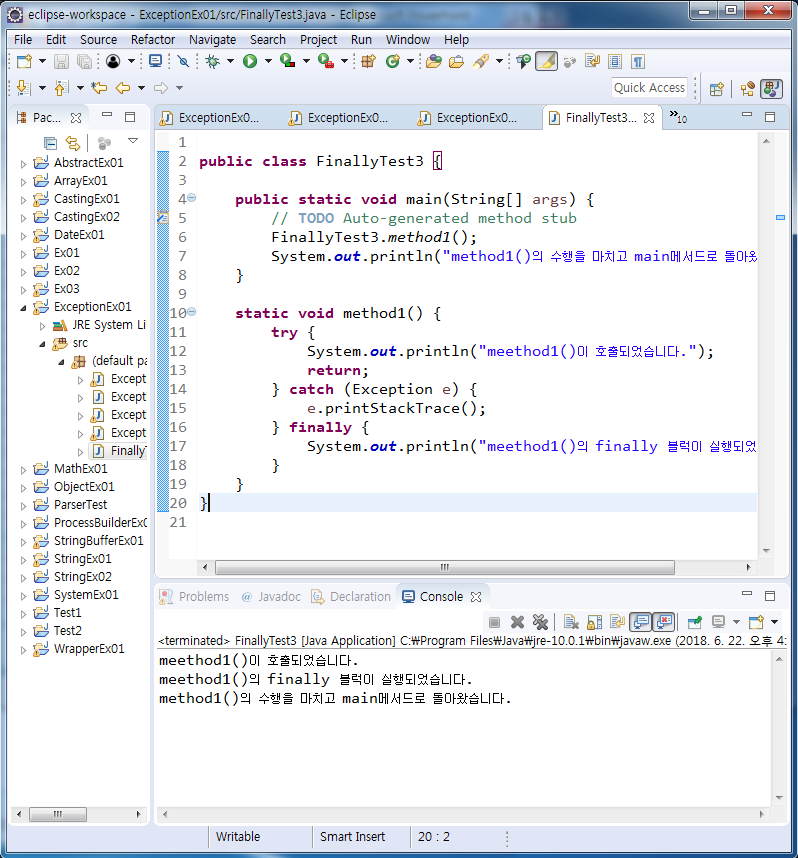
중간에 강제로 return을 주었지만 finally 블럭을 반드시 실행한다
예외 발생시키기
키워드 throw를 사용해서 프로그래머가 고의로 예외를 발생시킬 수 있다.
public class ExceptionEx05 {
	public void method1(int num) {
		System.out.println("method1() 시작");
		try {
			if(num >= 100) {
				// 강제 Exception 발생
				Exception e = new Exception("num이 100보다 크다");
				throw e;
			}
			System.out.println("method() 정상");
		} catch(Exception e) {
			System.out.println("익셉션 발생");
		}
		System.out.println("method1() 종료");
	}

	public static void main(String[] args) {
		// TODO Auto-generated method stub
		ExceptionEx05 ee = new ExceptionEx05();
		//ee.method1(10);
		ee.method1(101);
	}

}
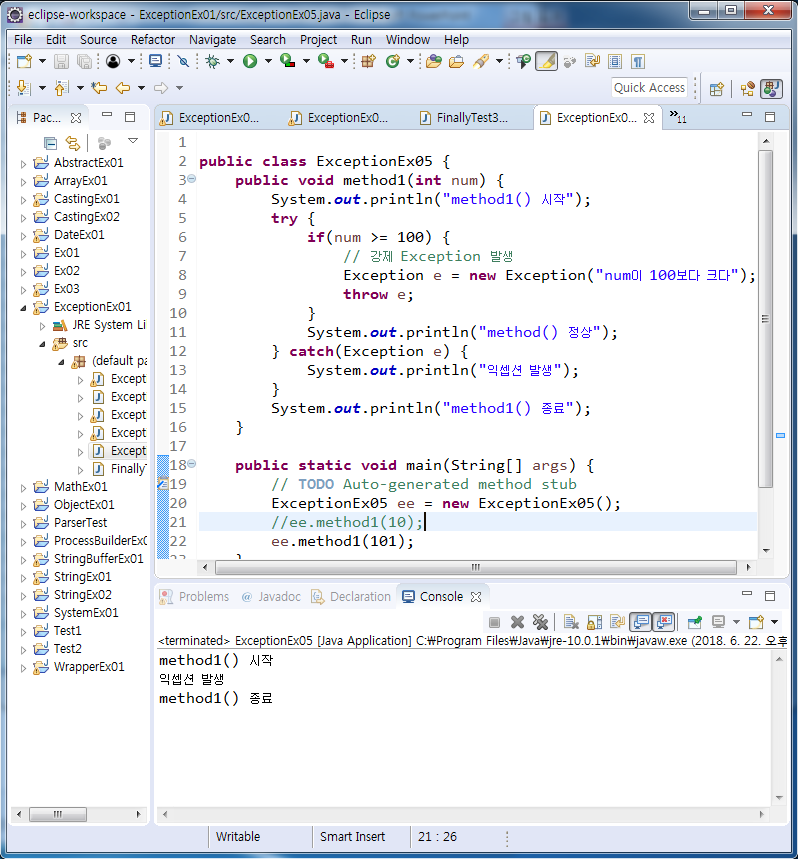
100이상이라 if문을 들어갔어야 하지만 강제로 Exception이 발생되어 skip 되었다
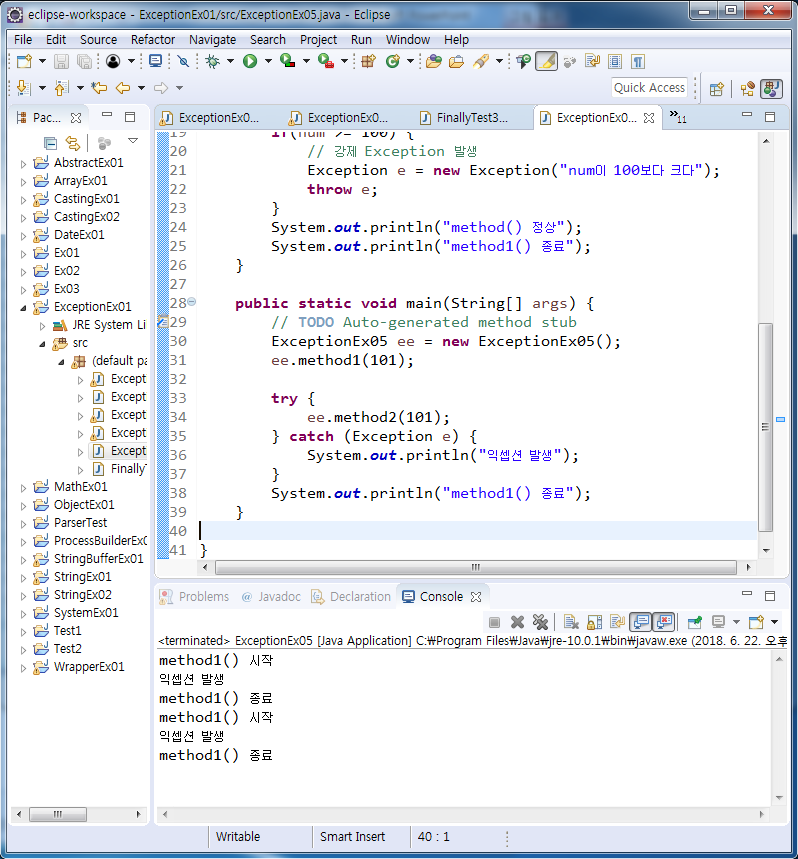
ExceptionEx05 - 메서드에 예외 선언하기
public class ExceptionEx05 {
	public void method1(int num) {
		System.out.println("method1() 시작");
		try {
			if(num >= 100) {
				// 강제 Exception 발생
				Exception e = new Exception("num이 100보다 크다");
				throw e;
			}
			System.out.println("method() 정상");
		} catch(Exception e) {
			System.out.println("익셉션 발생");
		}
		System.out.println("method1() 종료");
	}
	public void method2(int num) throws Exception {
		System.out.println("method1() 시작");
		if(num >= 100) {
			// 강제 Exception 발생
			Exception e = new Exception("num이 100보다 크다");
			throw e;
		}
		System.out.println("method() 정상");
		System.out.println("method1() 종료");
	}

	public static void main(String[] args) {
		// TODO Auto-generated method stub
		ExceptionEx05 ee = new ExceptionEx05();
		ee.method1(101);

		try {
			ee.method2(101);
		} catch (Exception e) {
			System.out.println("익셉션 발생");
		}
		System.out.println("method1() 종료");
	}

}
'Web & Mobile > JAVA' 카테고리의 다른 글
| Lecture 29 - Java(10) ArrayList, LinkedList, HashSet, TreeSet, HashMap, File (0) | 2023.06.20 |
|---|---|
| Lecture 28 - Java(9) 로또발생기, StringTokenizer, StringJoiner, Scanner, Arraylist (0) | 2023.06.20 |
| Lecture 26 - Java(7) 주민번호체크, wrapper 클래스, Date, Calendar (0) | 2023.06.20 |
| Lecture 25 - Java(6) 클래스, 접근제어자, 이클립스 환경 구축법 (0) | 2023.06.20 |
| Lecture 24 - Java(5) 생성자, 변수의 초기화, 상속, 인스턴스, 패키지, import, 클래스 (0) | 2019.04.19 |


댓글